Why tests fail

Red signals the test has failed. This is due to 3 reasons:

  1. You have a bug in your app

We will pinpoint you to exact moment where it broke. Swipe through the report snapshots or launch the trace viewer for more details. For an even more precise debugging, we created the open source Debugtopus to use locally on your machine.
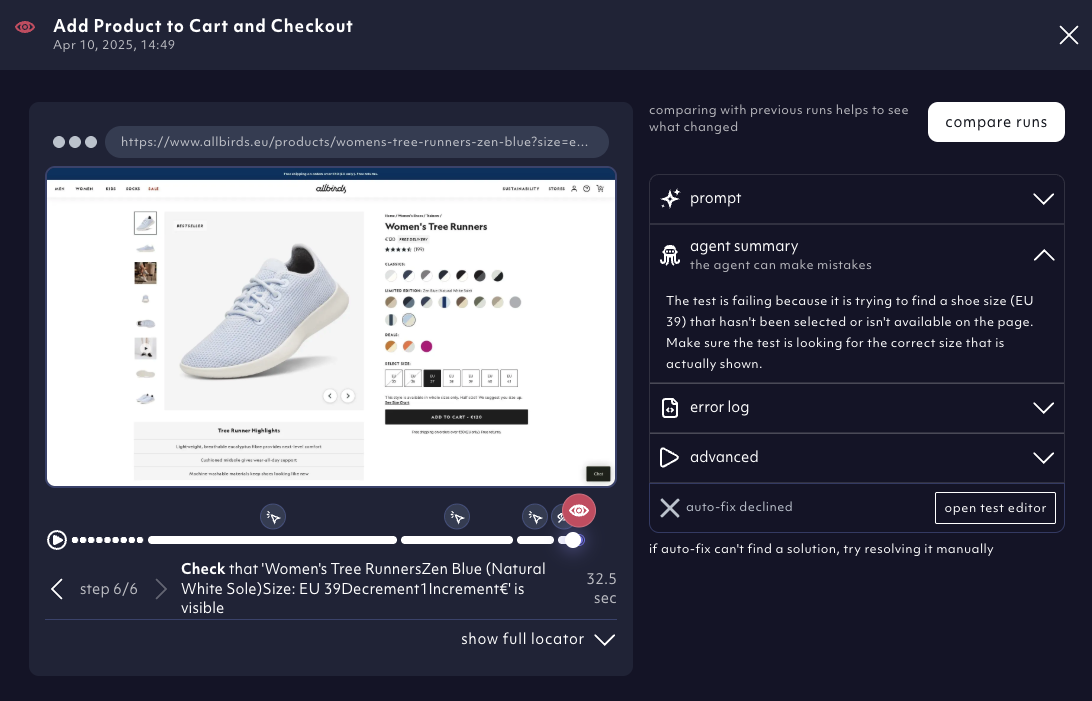
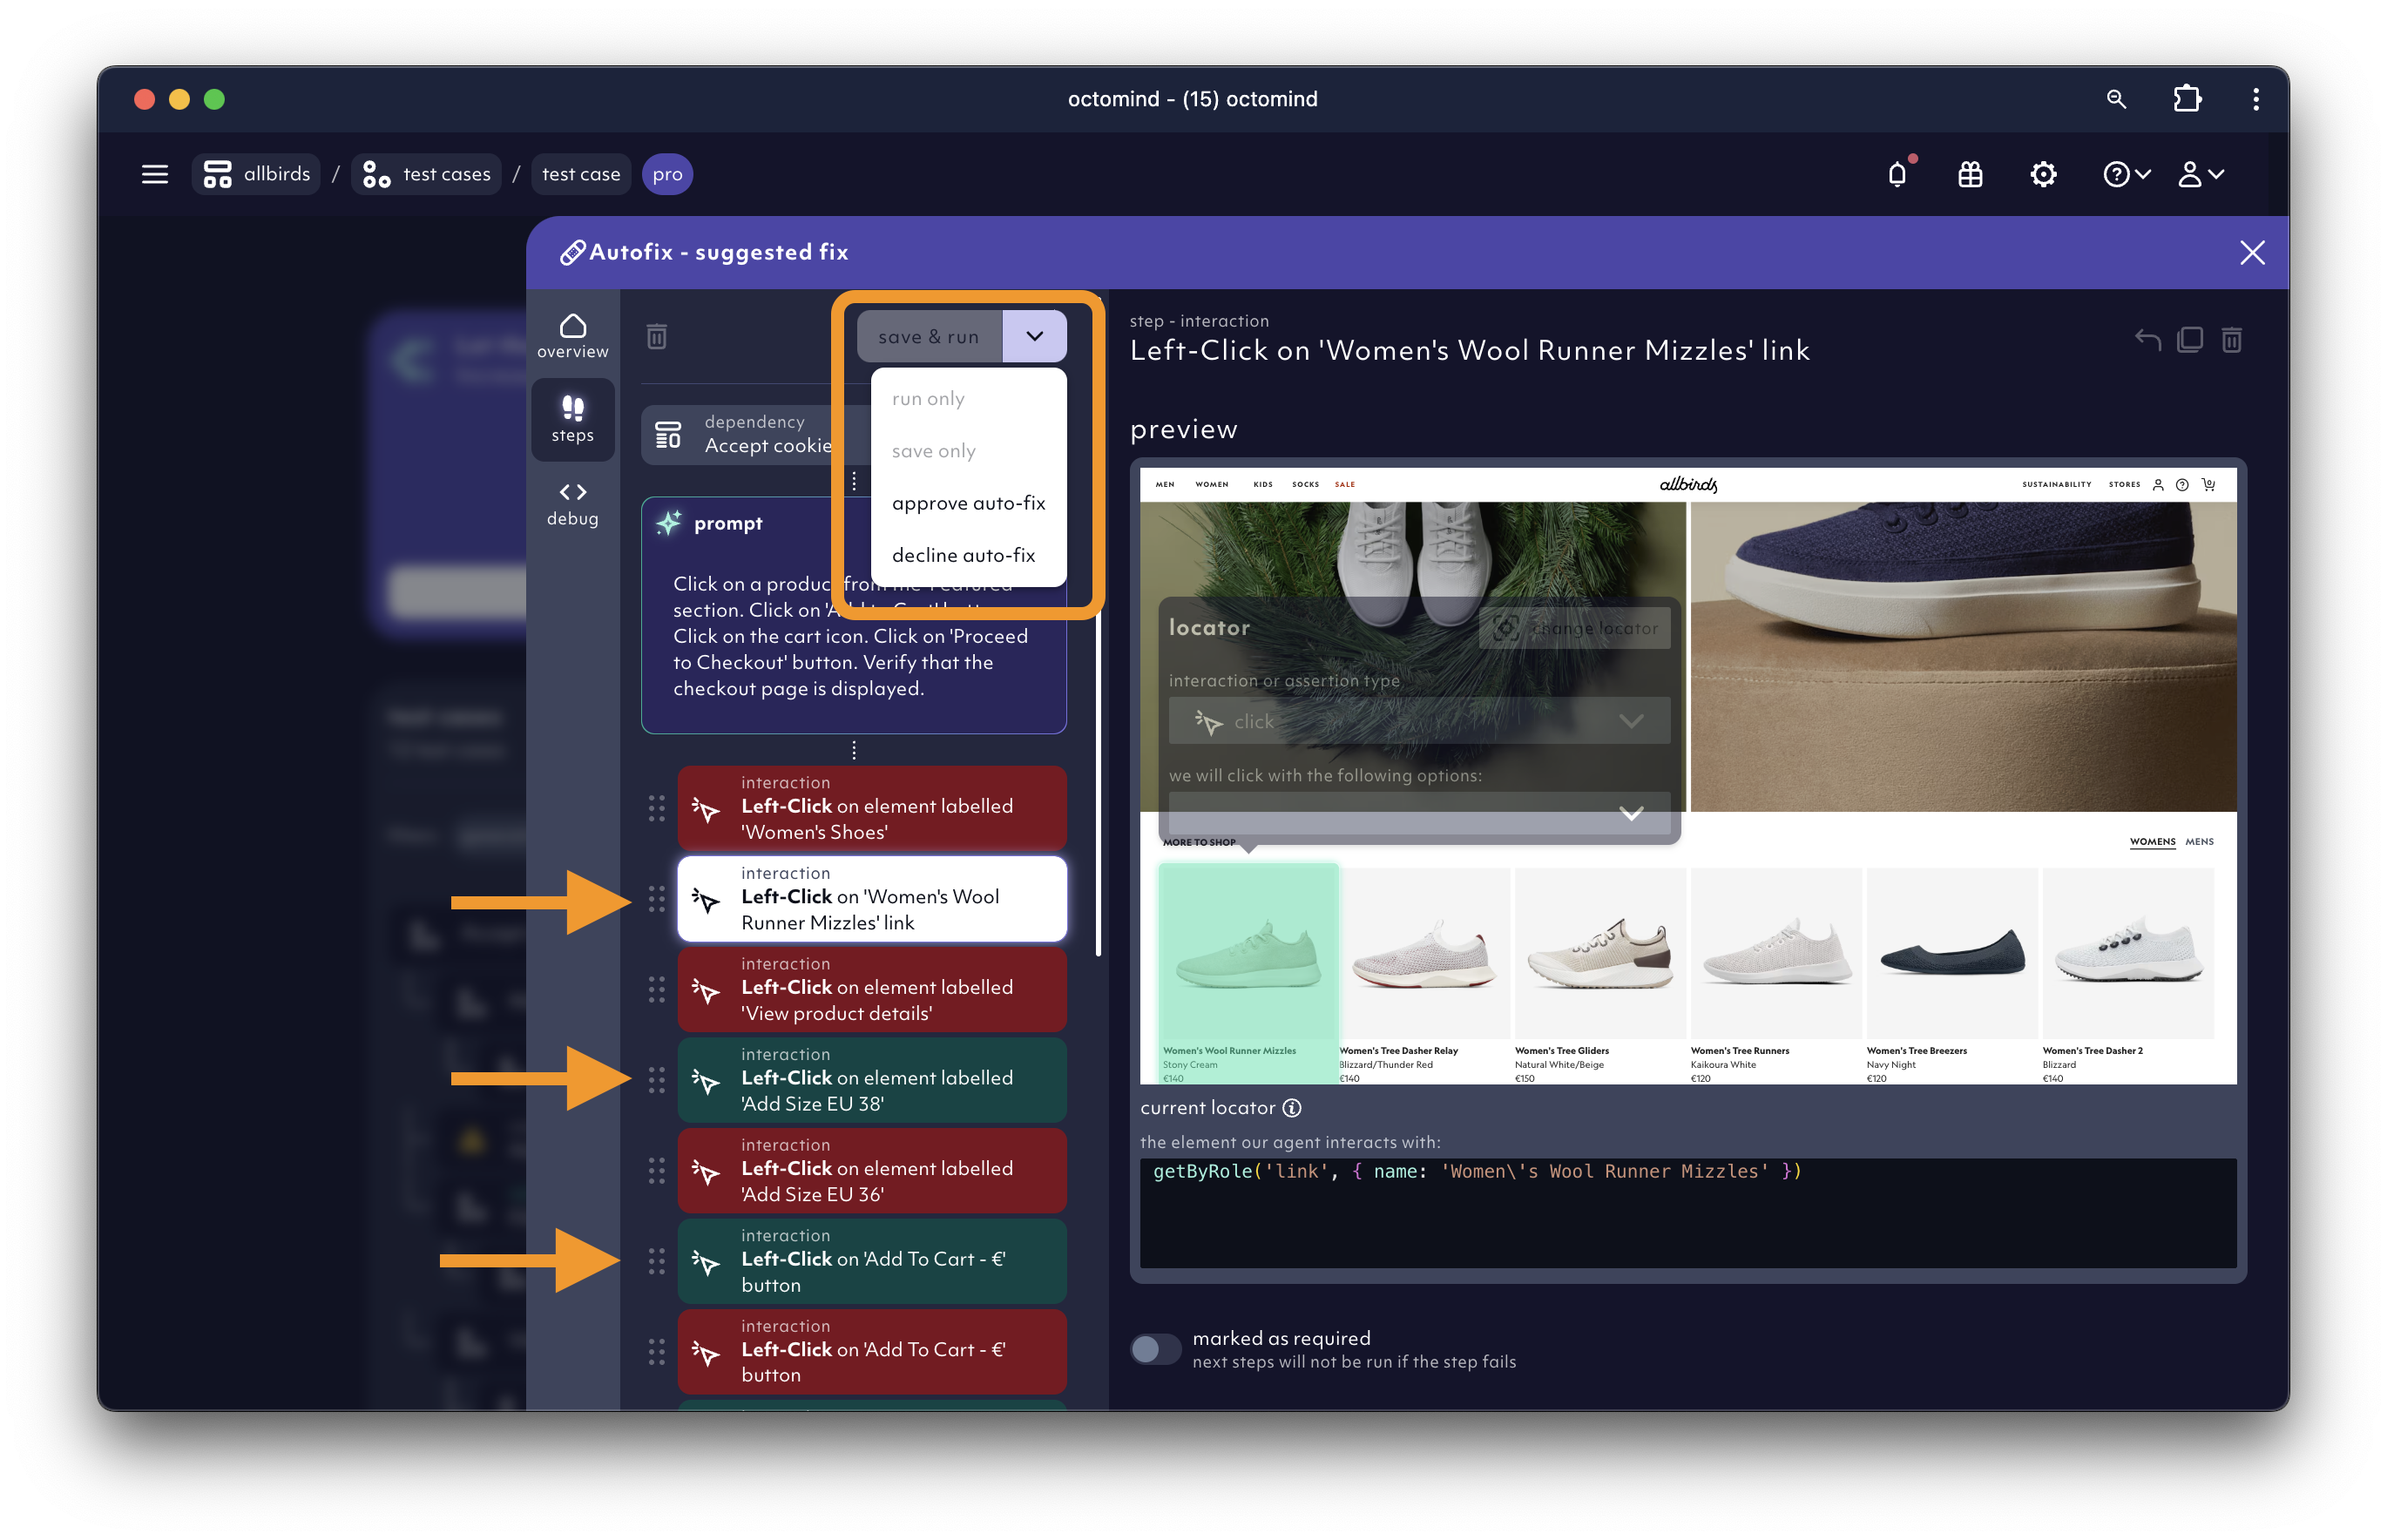
snapshots carousel in test reports

Snapshots in test reports showing what happened during the test run, 7/2024

  1. The test is broken

End-to-end tests tend to break when the app changes. This is not just annoying, but a major time investment.

If you would like to fix the test on your own, read further. But we can also fix it for you. This feature in included in Octomind’s paid tiers.

broken test in Playwright trace viewer

Example of a broken test reflecting a change in user flow, trace viewer screenshot 7/2024

  1. The test is flaky

Flaky tests produce different results when running the exact same test case. We are deploying multiple strategies to fight flakiness, but it can’t be prevented 100% of the time just yet.

Inspect the reason of the failure

From the test report, go to the debug tab of your test result and launch the trace viewer.

launch trace viewer

Launch trace viewer for more test run details, 7/2024

The trace viewer will highlight the exact place in the test execution where the test failed. Learn how to inspect Playwright trace viewer step by step to identify the culprit of the broken test. Our open source Debugtopus is an additional help that allows you to set breakpoints and step through the code.

Correct the broken test steps

This applies when your app works as intended, but the test fails to run. Use our editing tools to quickly add, remove steps or adjust locators. Here is how you edit test cases.

The Hack: How we fix our own tests

Test often break in more places and fixing them one by one can become annoying. It doesn’t have to.

Since we dogfood our own end-to-end tests, we have discovered this easy hack:

  1. go to the test case
  2. check the prompt - if it’s not matching the desired flow anymore, adjust it
  3. click regenerate steps
  4. select the last step you wish to keep
  5. confirm generate steps

The AI agent will re-generate steps of your test and validate them. If it’s alright, click save & run. If it needs adjustment, this is how you edit test cases.

Runs and respective snapshots and traces become outdated after a while. Start another run to see an up-to-date state to tell which step broke. Refresh it by hitting the run only button under save & run.

Run only to validate the test before saving it

'run only' to validate the test before saving it, screenshot 08/2024