Now that we’ve gotten a better understanding of why the agent can fail to generate a test, we will take a look at the tooling available to help the agent succeed in generating your test.Documentation Index
Fetch the complete documentation index at: https://octomind.dev/docs/llms.txt
Use this file to discover all available pages before exploring further.
Starting point
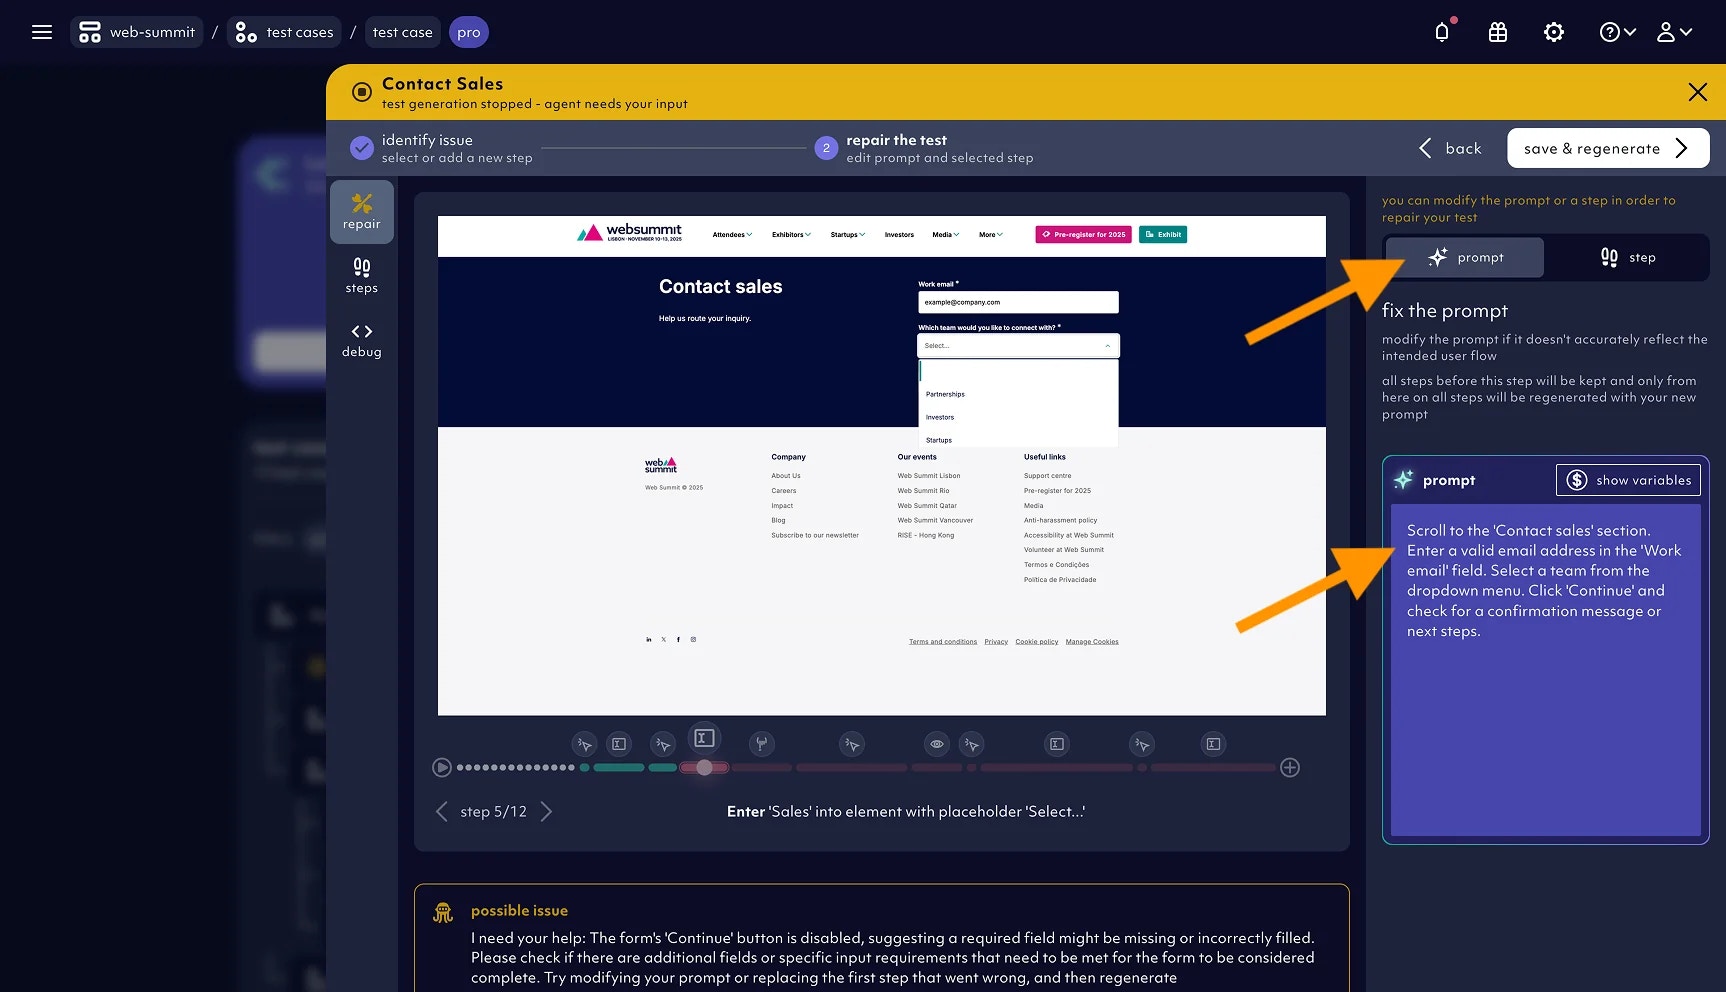
Let’s say you tried to generate a test using a prompt and the agent stopped the generation early: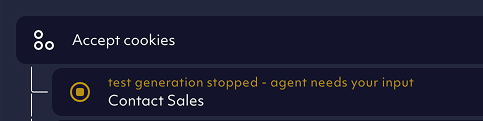
Repair the unsuccessful attempt of the agent. Once you click “Repair”, you will land in a specialized “repair” section that will allow you to better understand what happened and gives you option to nudge the agent in the right direction.
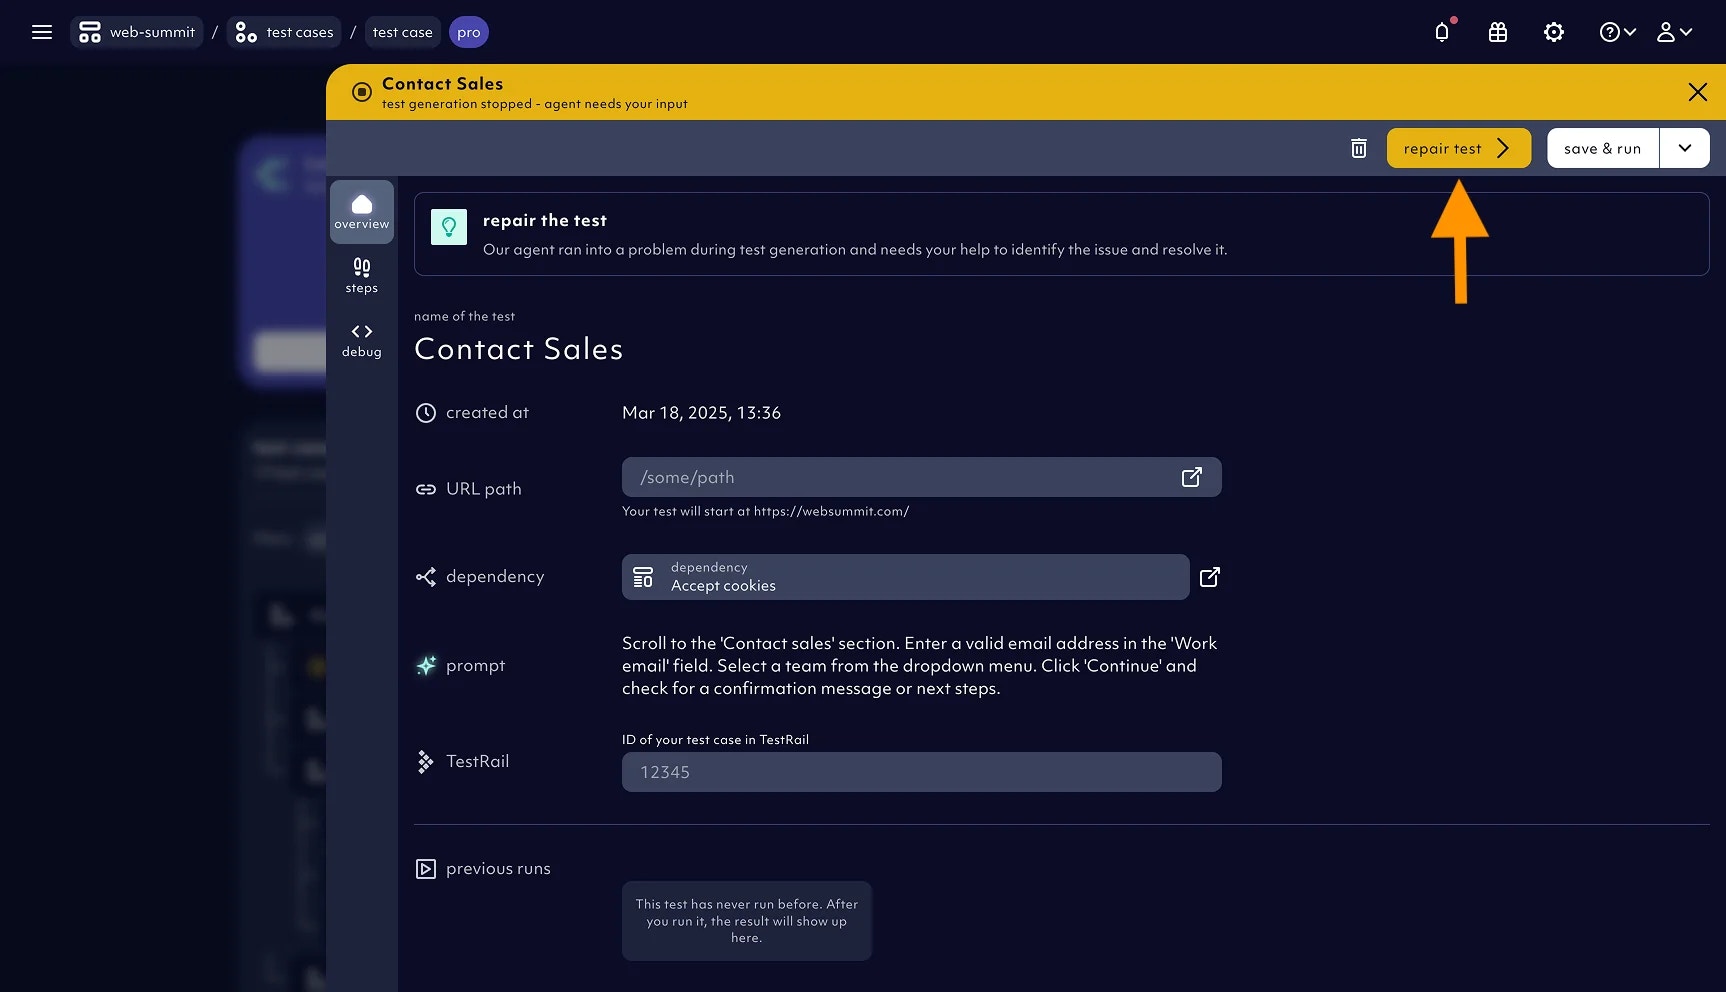
- the prompt: as a reminder on what the test was supposed to cover
- the Agent reasoning for the failure: why test agent thinks it didn’t succeed in translating the prompt to test steps
- the timeline: a sequence of screenshots following the agent’s actions on the page until the point of stoppage
Working with the timeline to identify the point of failure
The timeline consists of all test case steps until the point of stoppage. Test steps of dependencies (e.g. a login test that was executed before the test that failed to generate) will be displayed in the white dotted section of the slider. Your job is to select the first step where the agent went off-track. This could be clicking the wrong element, entering a wrong value or more generally interacting with the page in the wrong way.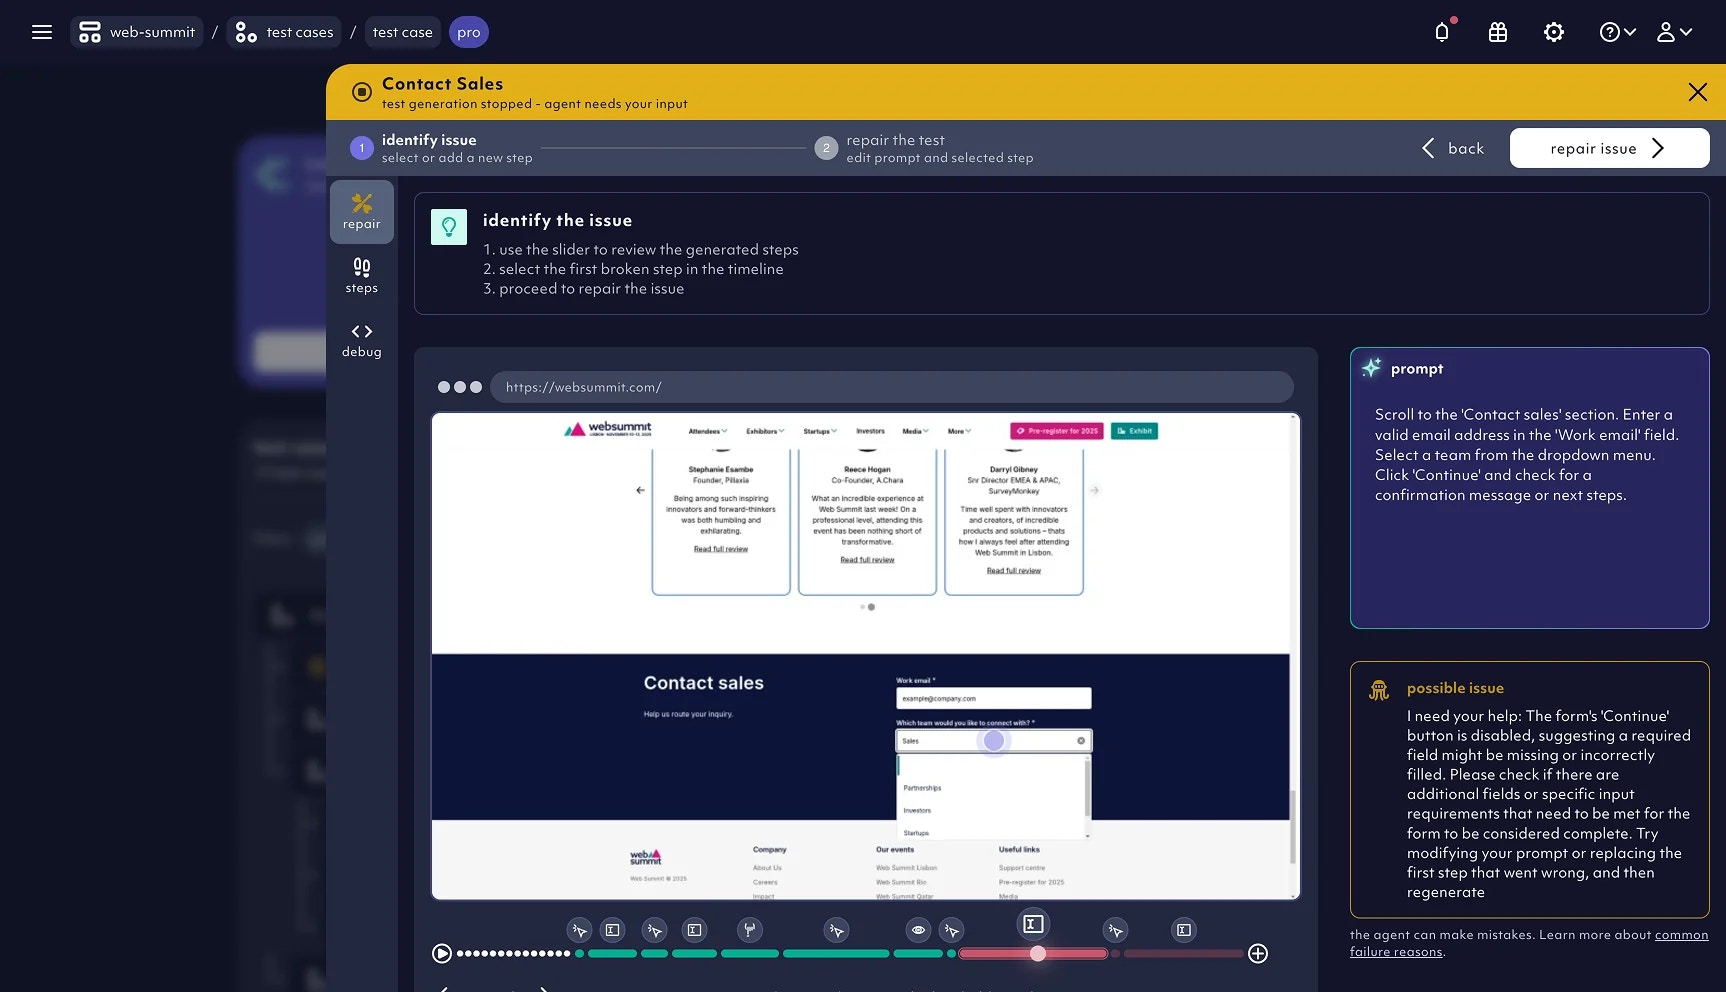
Identify where agent needs help - select a step on the timeline
To identify where the agent went off track, move the slider along the timeline and stop at the first incorrect step. This selects the step you want to modify.Meaning of the colors on the timeline
As you move the slider, you’ll notice changes in the step colors:- Green steps: These steps remain unchanged. Everything before your selected step is preserved in the next test generation
- Red steps: These steps will be discarded and regenerated. The selected step and all subsequent steps turn red to indicate they will be replaced.
- White dotted section: Highlights the dependencies that were executed prior to this generation.
Repair the test
No matter how you choose to fix the test, always follow these steps:- Select the step you want to modify.
- Click the
repair issuebutton. - Click
save & generateto apply the changes.
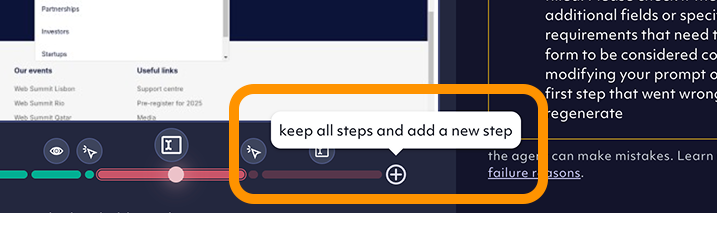
1. Add new step
The most common use case for this is when an assertion is missing at the end of the test. You can also use it to guide the Agent forward by adding a nudge. Adding a new step:- Click the
+button at the end of the timeline. - Click
repair issue. - Add an interaction or assertion by selecting an element on the page.
- Click
save & generateto apply the changes.
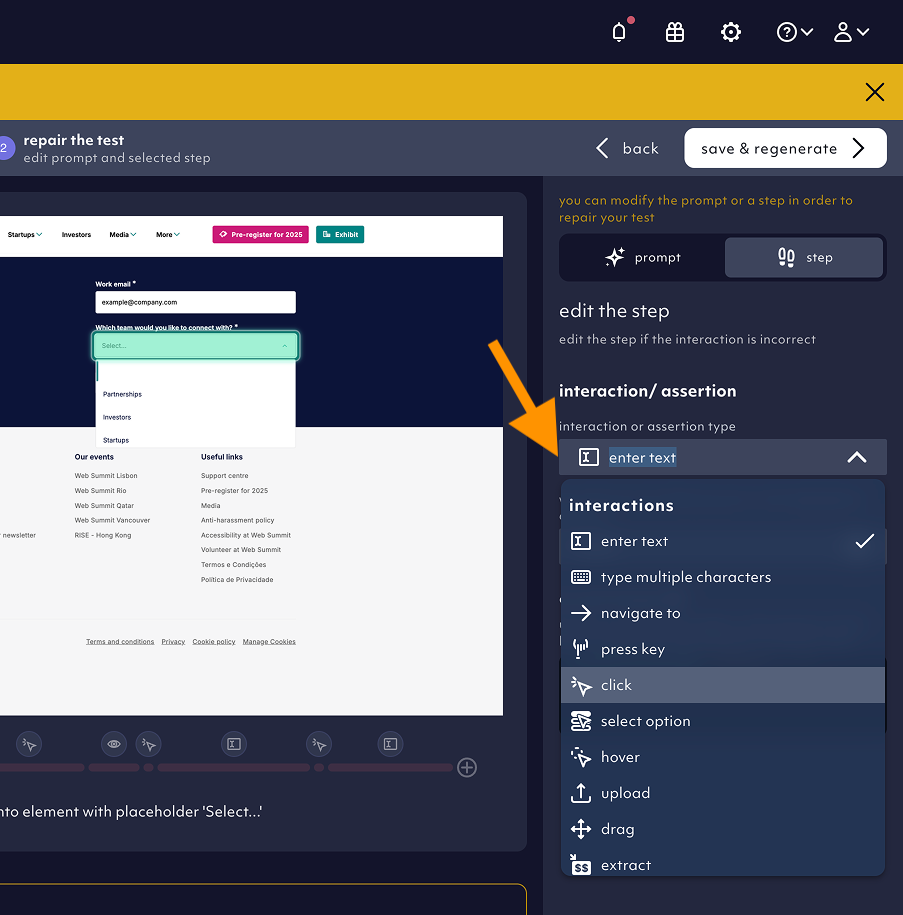
- Hover your mouse over the page.
- Click the element you want to select.
- Choose the interaction type in the pane on the right.
2. Modify the prompt
Use this when multiple steps need to be changed, or when the agent requires clearer guidance on the action it should take. To update the prompt:- Select the step you want to modify. (Everything before this step will be preserved in the next test generation. To regenerate the entire test, move the slider to the first step.)
- Click
repair issue. - Click the
prompttab. - Update the prompt as needed.
- Click
save & generateto apply the changes.
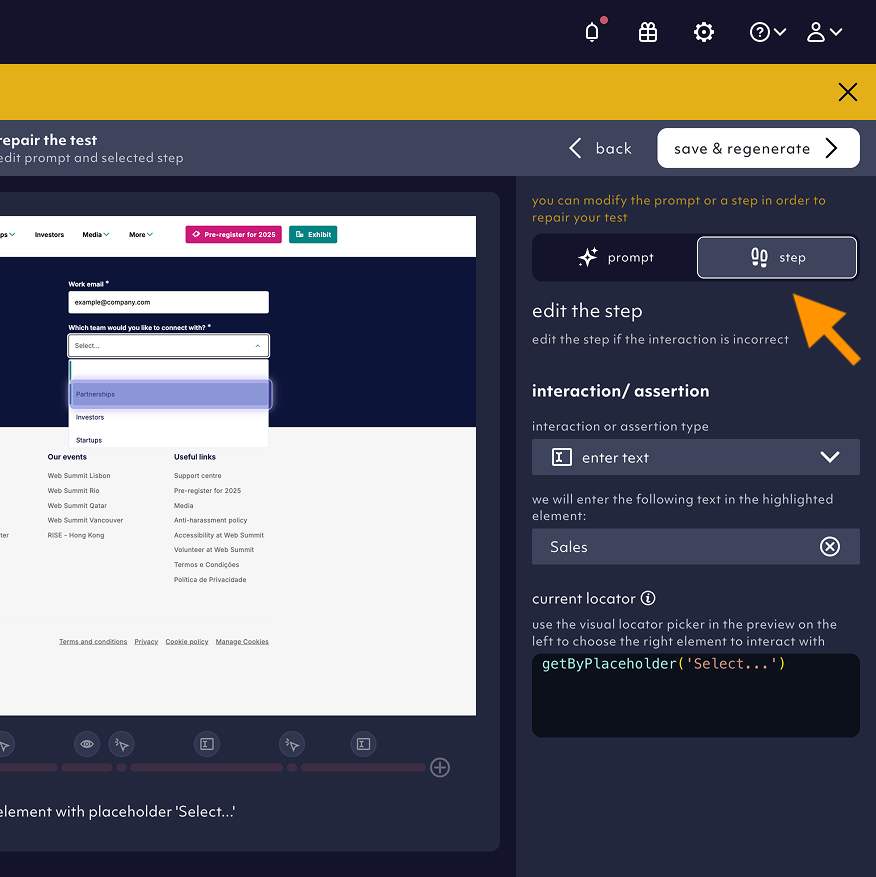
3. Modify a step
If the Agent selects the wrong element or applies an incorrect interaction or assertion, use this method to correct it. To correct a step:- Select the step you want to change.
- Click
repair issue. - Open the
steptab. - Update the interaction or assertion by selecting the correct element on the page.
- Click
save & generateto apply the changes.
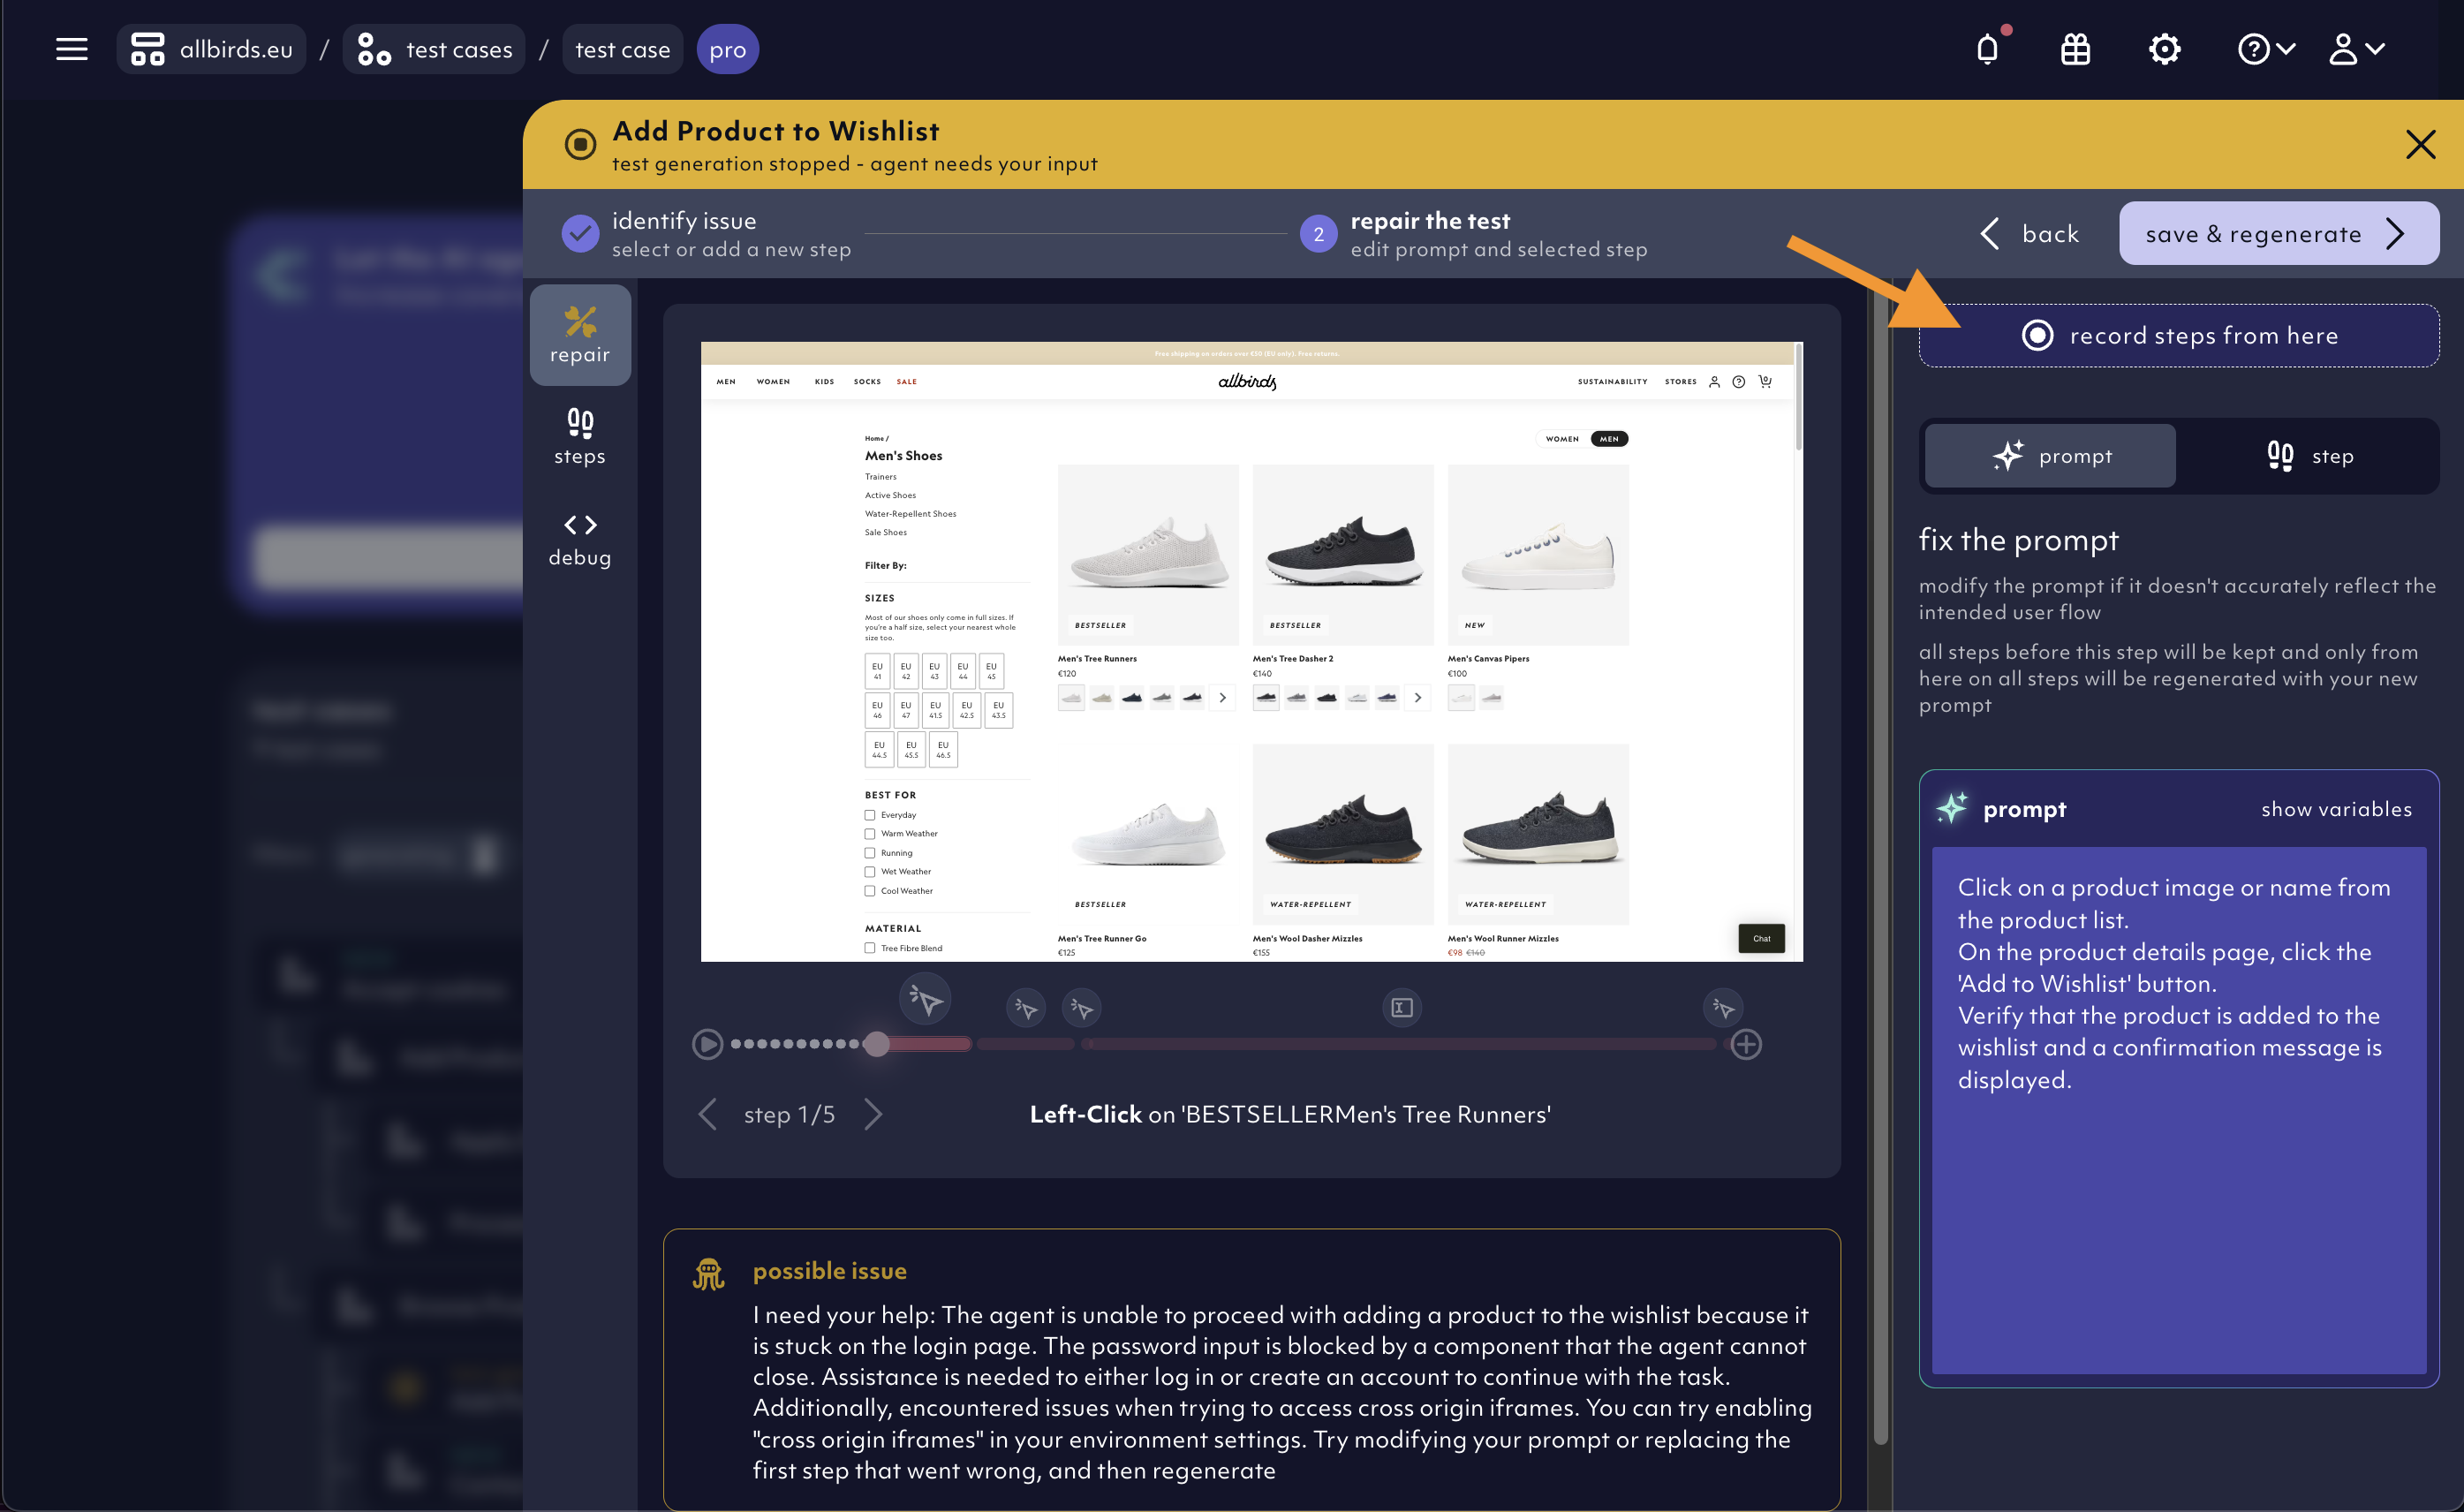
4. Repair the test by re-recording failed steps
In the repair mode, you can use the use the Recorder to re-record the right steps and finalize the test case that stopped generating. In the repair mode, navigate to the step where you want to start with the recording and hit therecord steps from here button.
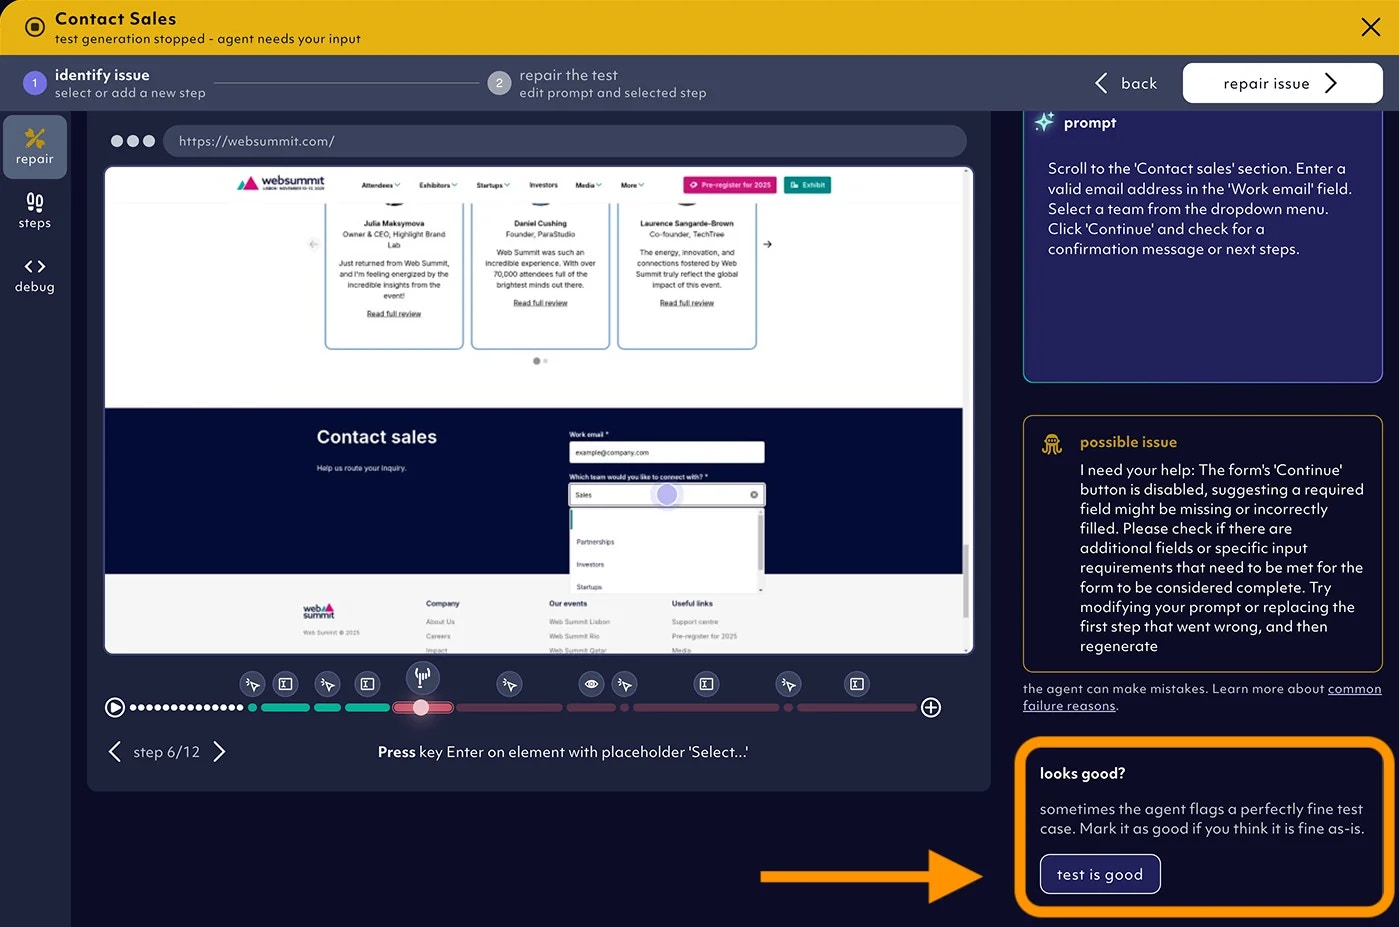
What if the test generation is actually successful?
While identifying the issue, it’s possible that there isn’t one. The Agent usually indicates this with messages like “I am not sure if I am done”. In this case, click thetest is good button below the Agent’s message. This will ensure no changes are made, and you can continue with the test validation process.
What if the generation is unsuccessful again?
This can happen with more complex or longer tests. In such cases, identify where the agent went off track and repeat the repair process.Most common reasons the Agent needs help
- Agent went off-track early: If the agent strays at the beginning of the test, you’ll need to fix the first step.
- Agent is stuck in a loop: When the agent repeats the same action without success, identify where the loop starts and apply a fix from there.
- Agent needs input: The agent may require input, such as what to enter in a text field.
- Agent doesn’t know which button to click: In cases where there are multiple entry points (e.g., header vs. footer navigation), the agent may be unsure of which button to click.
- Agent doesn’t know what the success should be at the end of the test: If the agent is unclear on what the expected success is, resulting in the absence of an assertion at the end, add a new step to define the expected outcome and complete the test.
- For a deep dive, see more common reasons here