Documentation Index
Fetch the complete documentation index at: https://octomind.dev/docs/llms.txt
Use this file to discover all available pages before exploring further.
1. Create an API key
The option to create your API key can be found within the settings menu.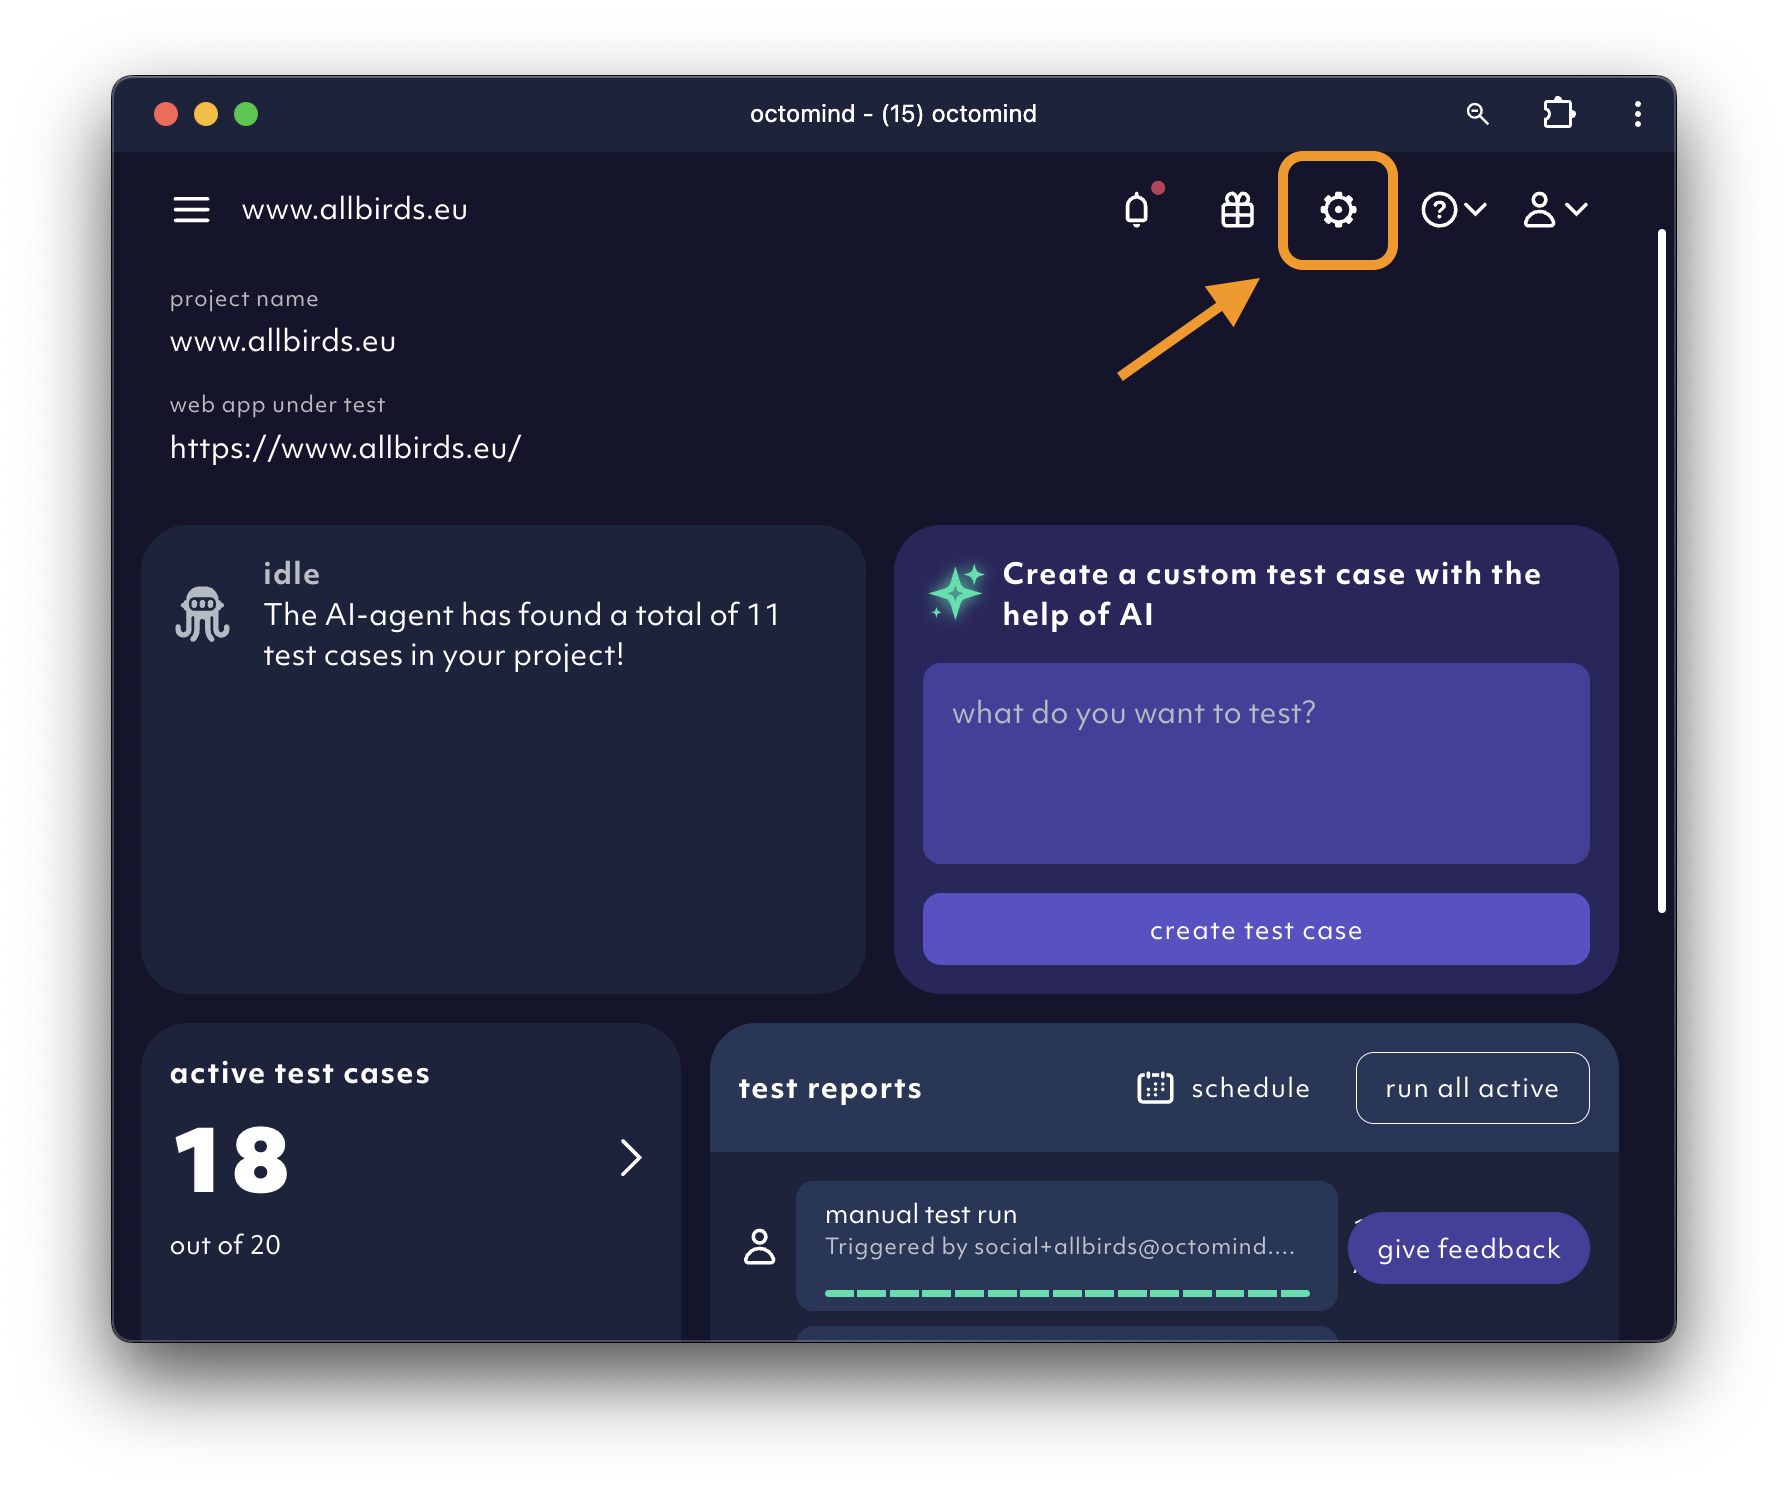
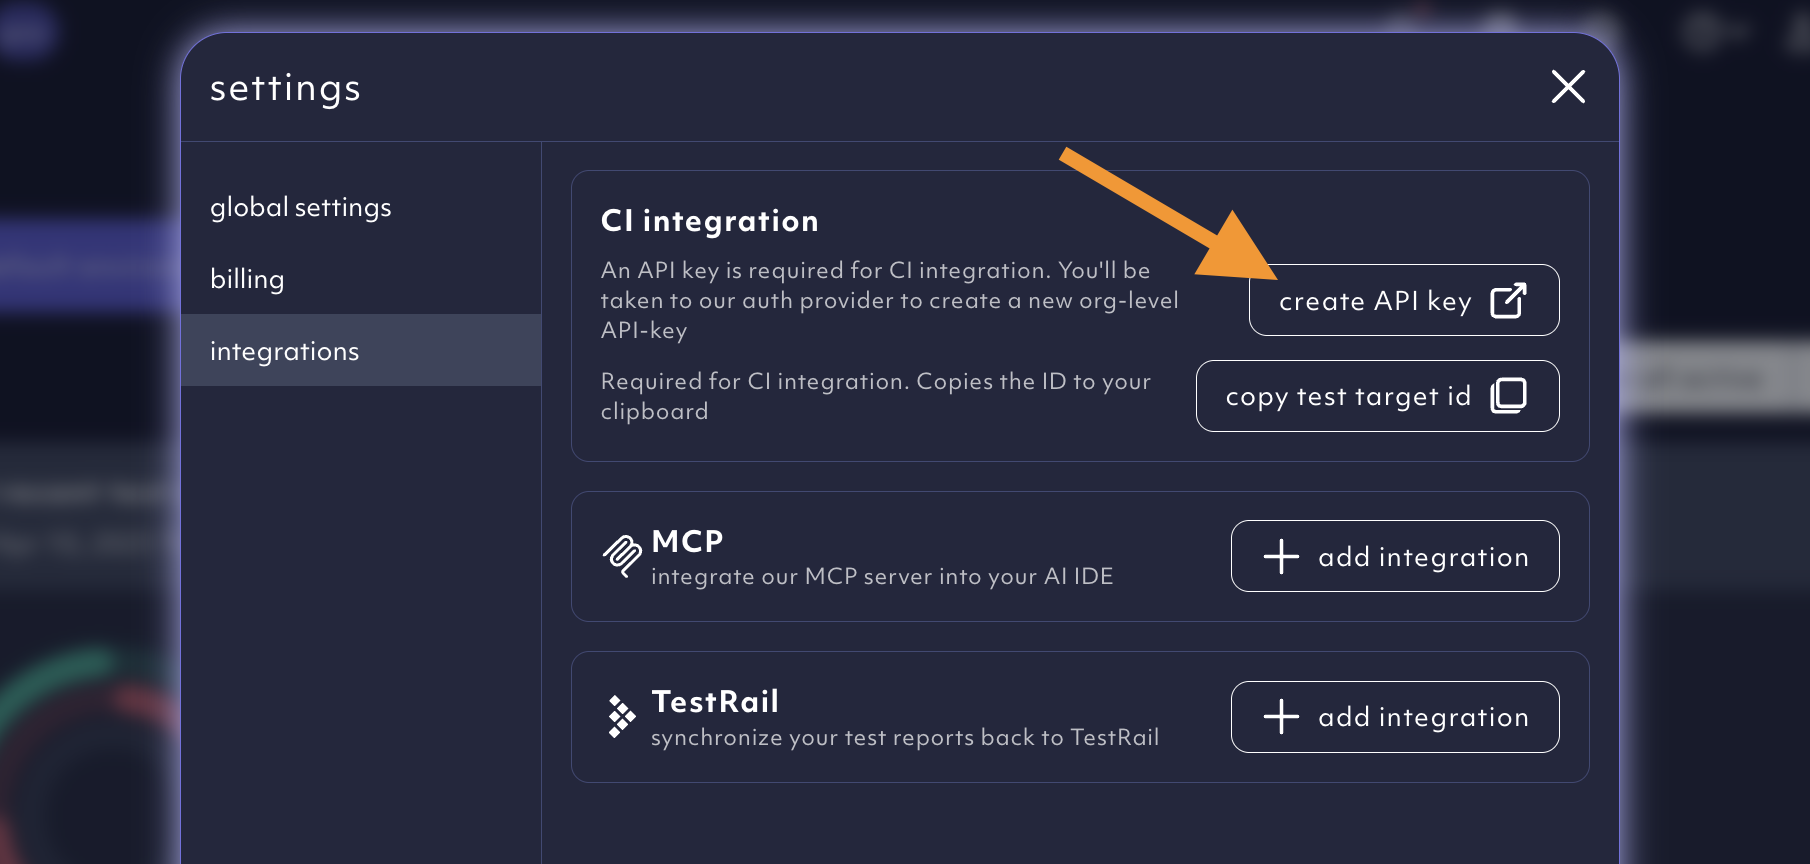
Create an API key.
2. Copy your test target ID
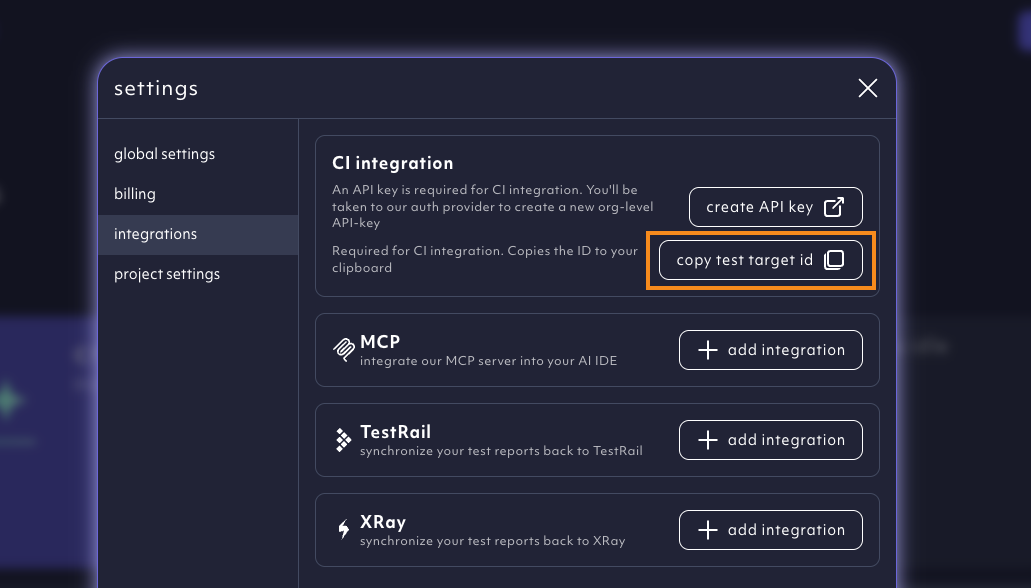
The option to copy your test target ID can be found within the settings menu.copy test target id.
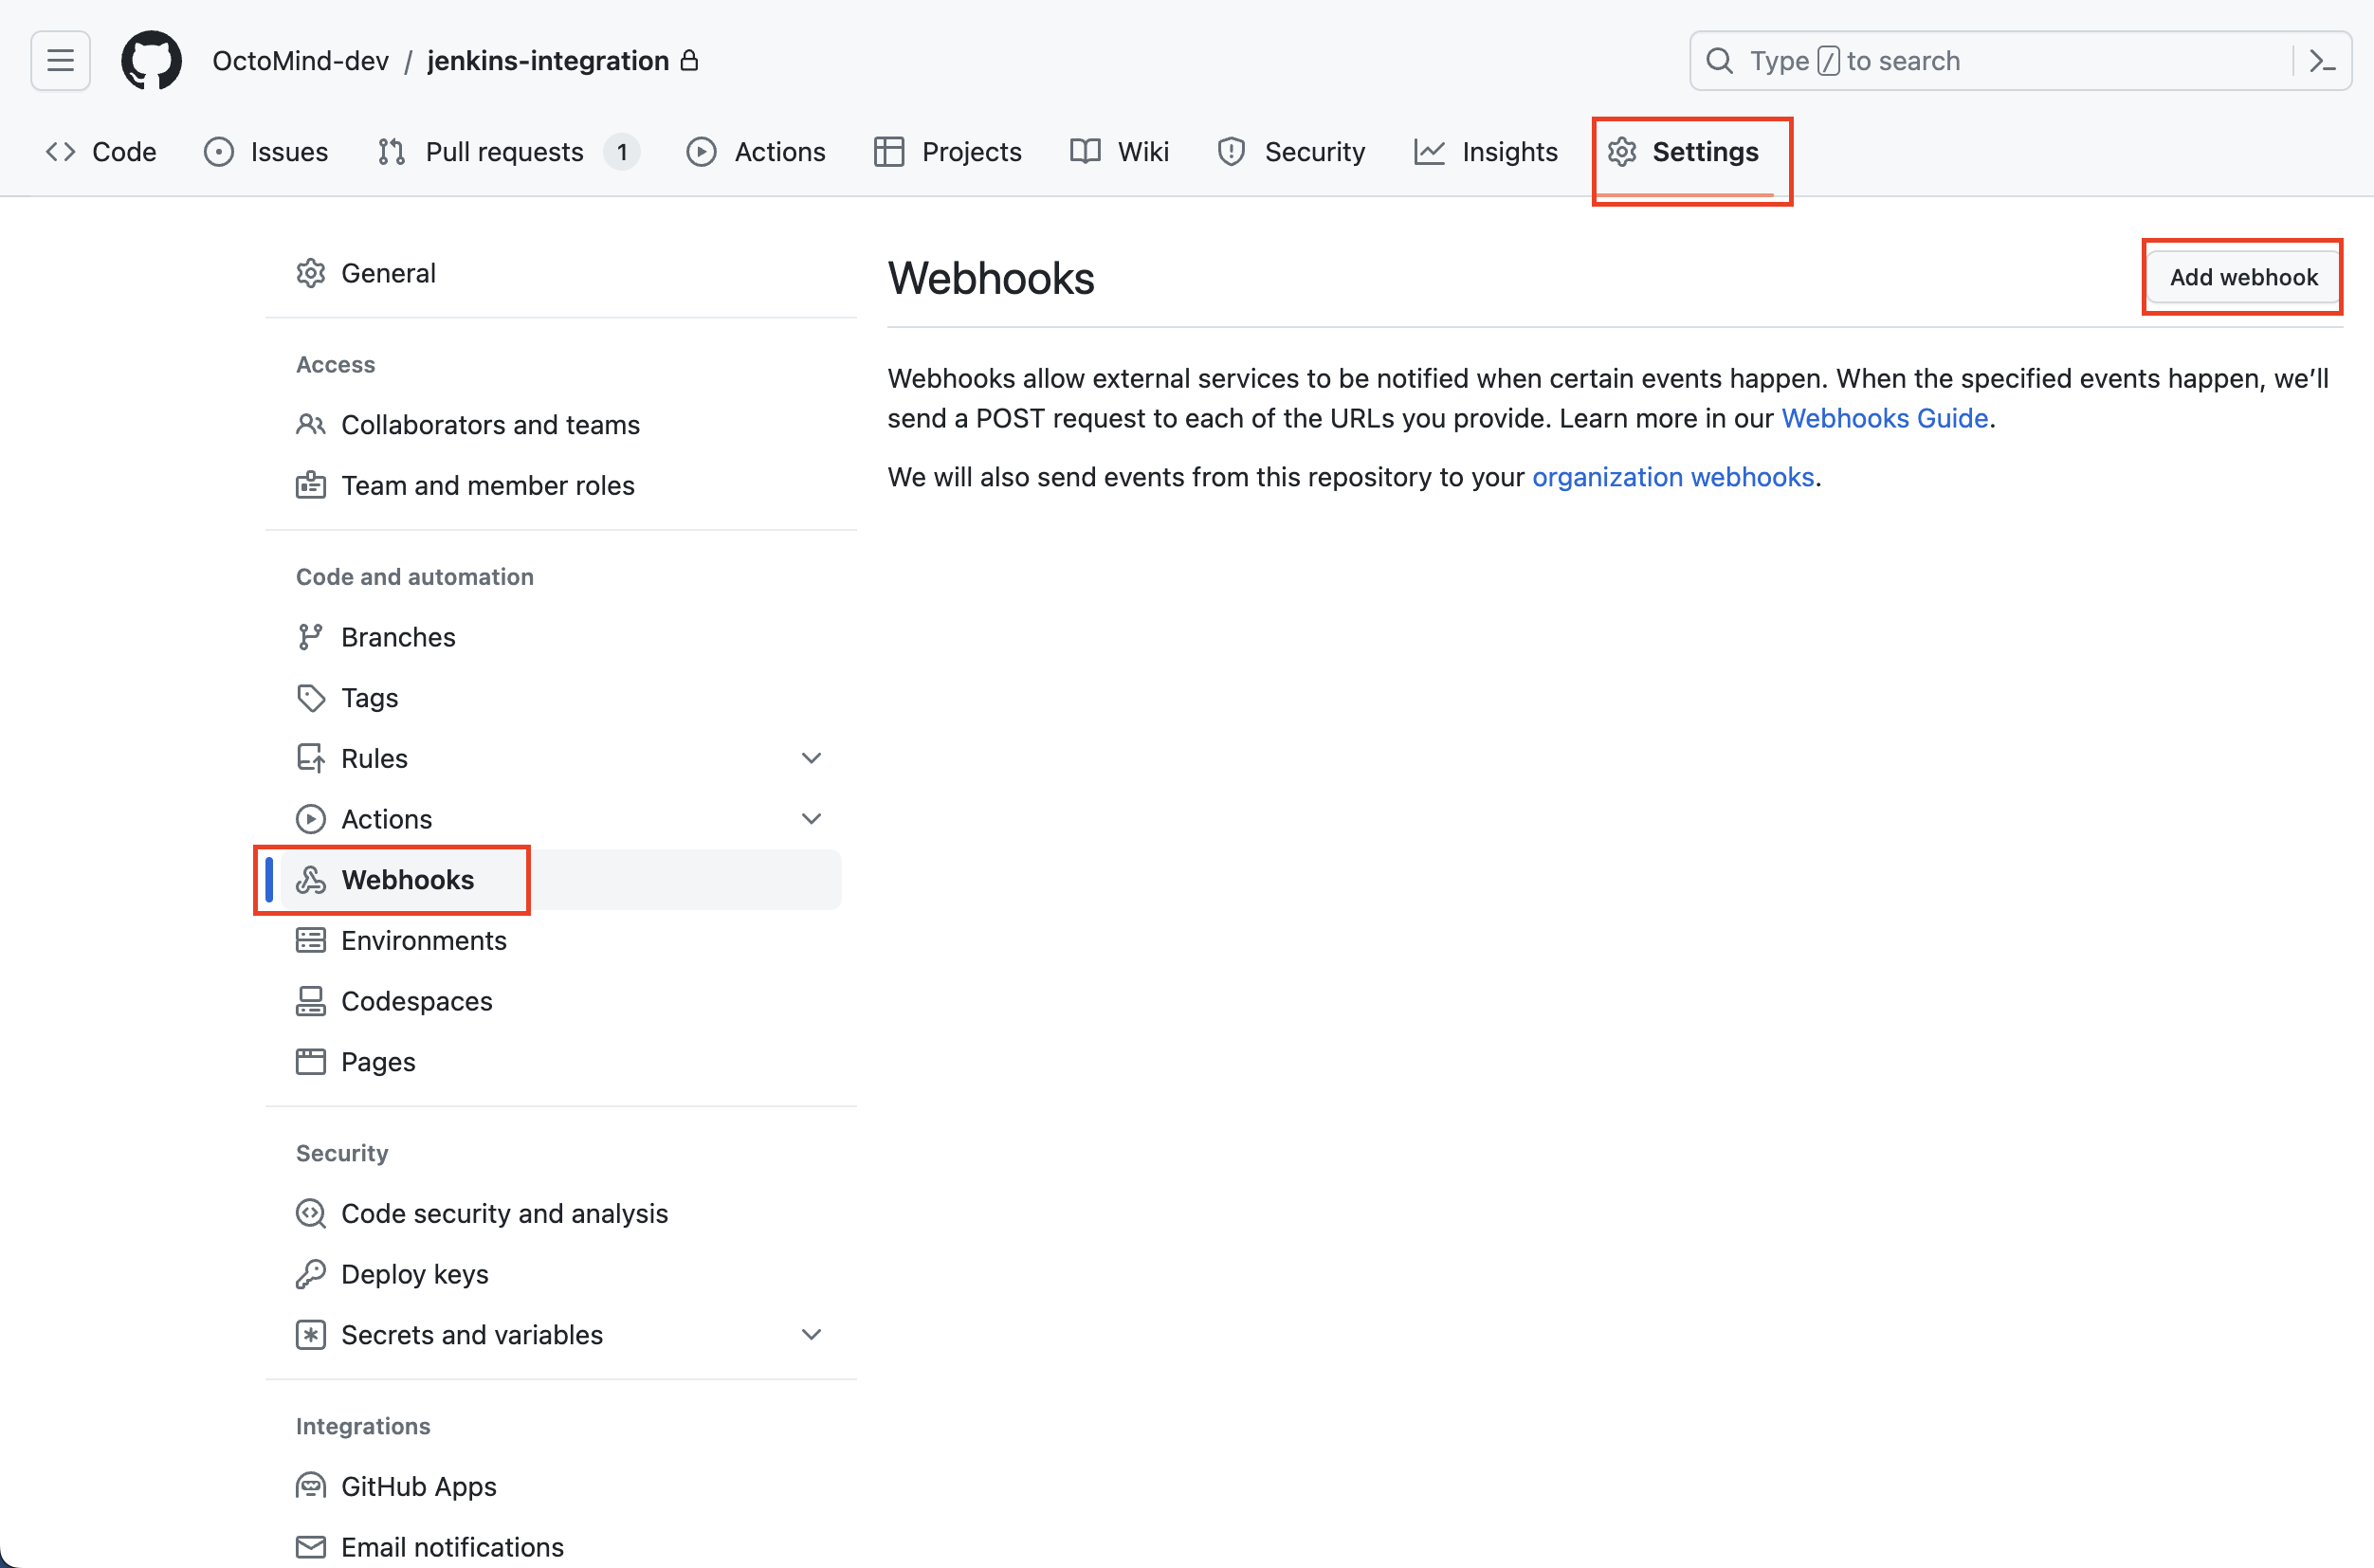
3. Adding webhook
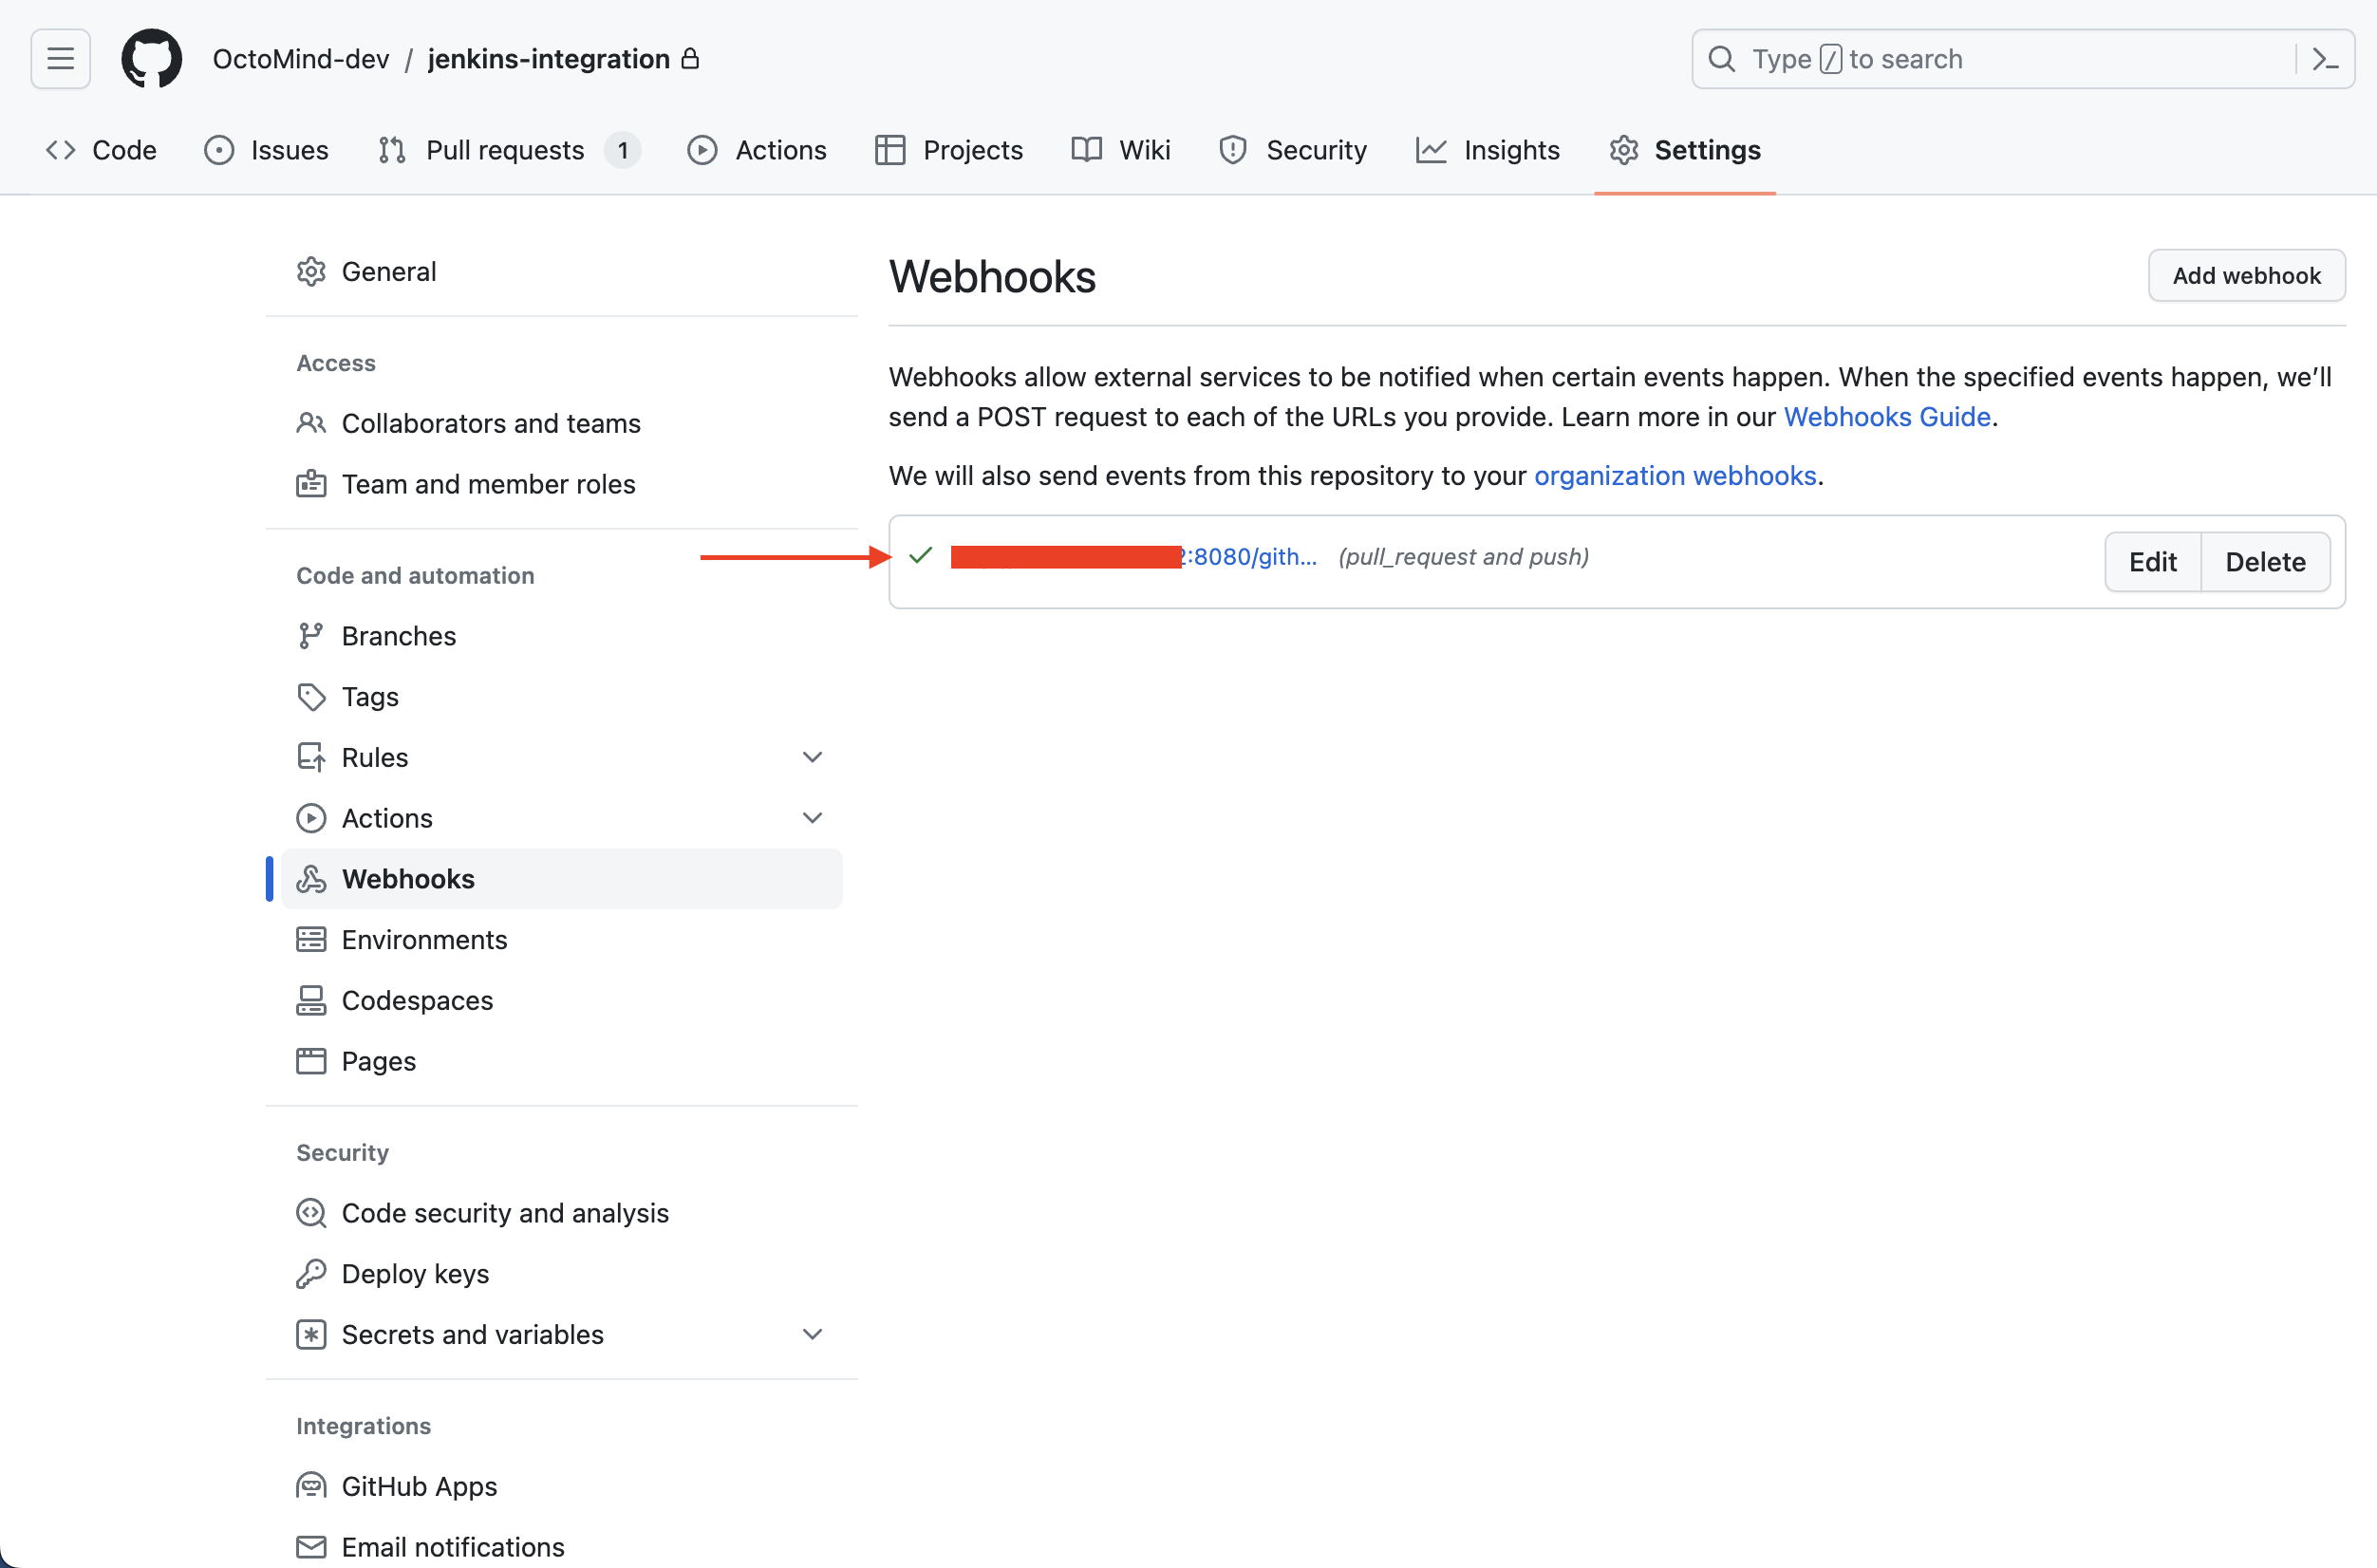
Select your repositorySettings, go to Webhooks and click Add webhook.
<your-jenkins-url>/github-webhook/ and select application/json for Content type.
Select triggers that best suite your need.
In general, the push event is enough, but for this example we also want to trigger Octomind on pull request.
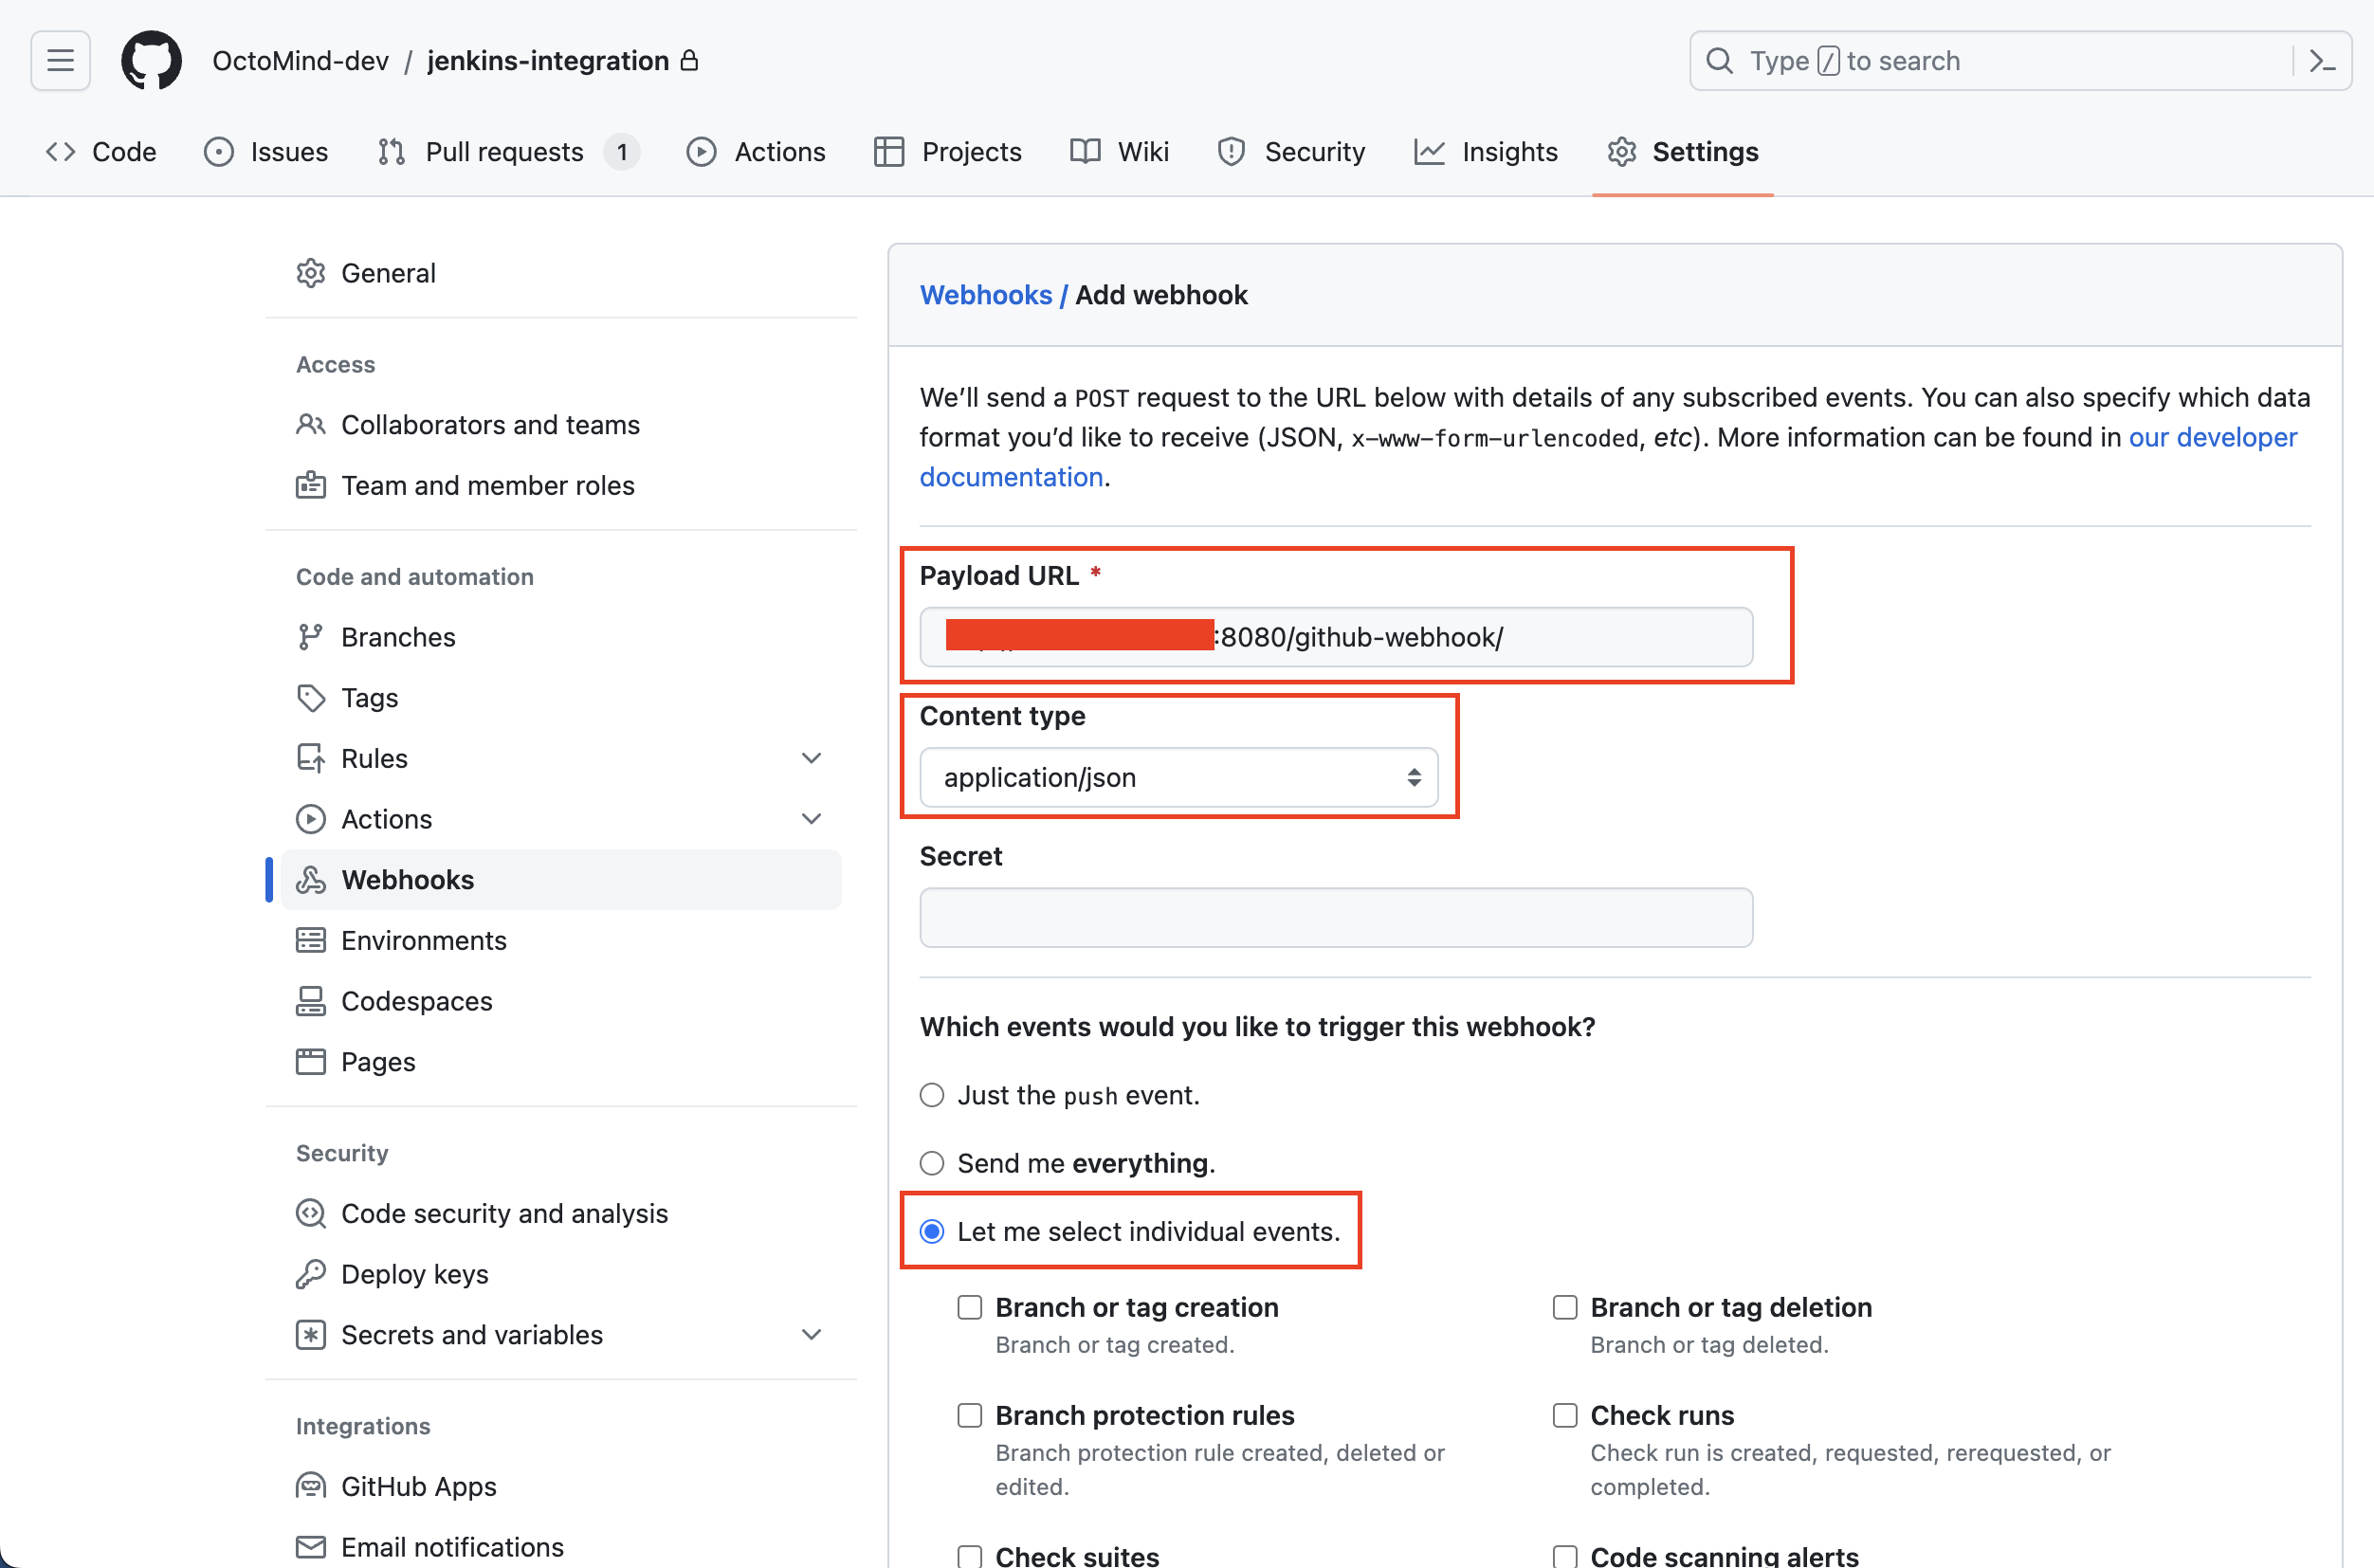
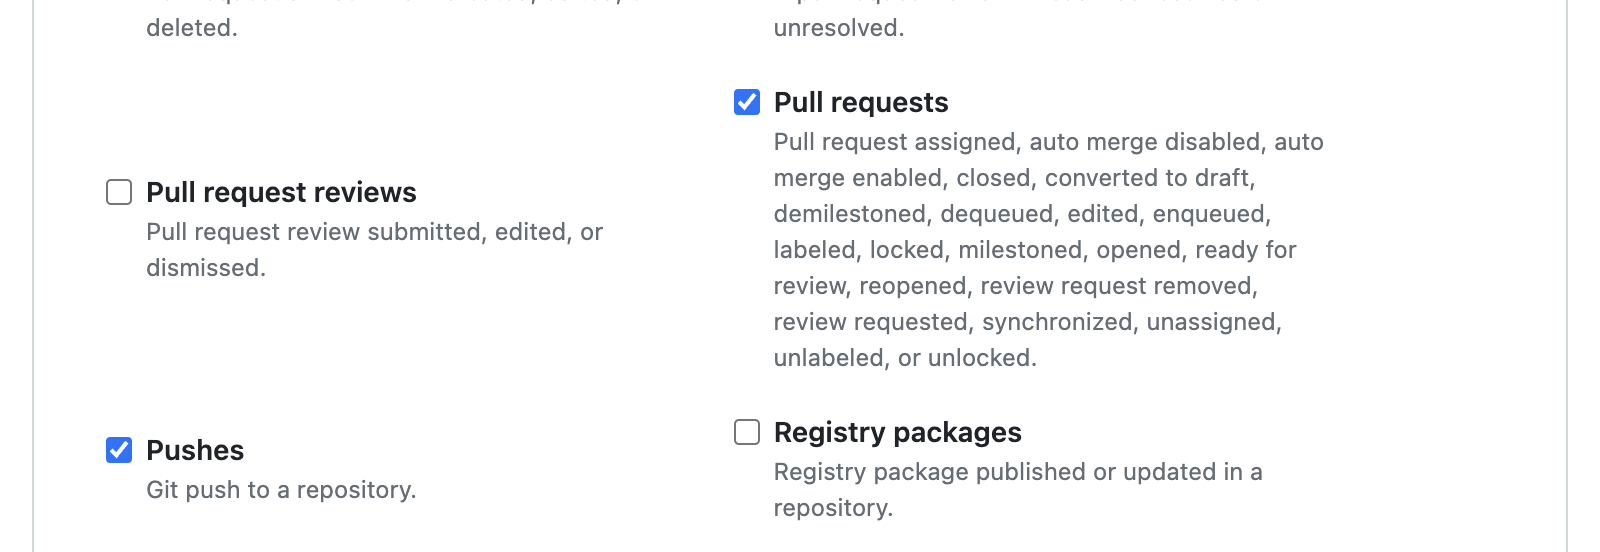
Pull requests and Pushes and after that click on Add webhook.
4. Jenkins
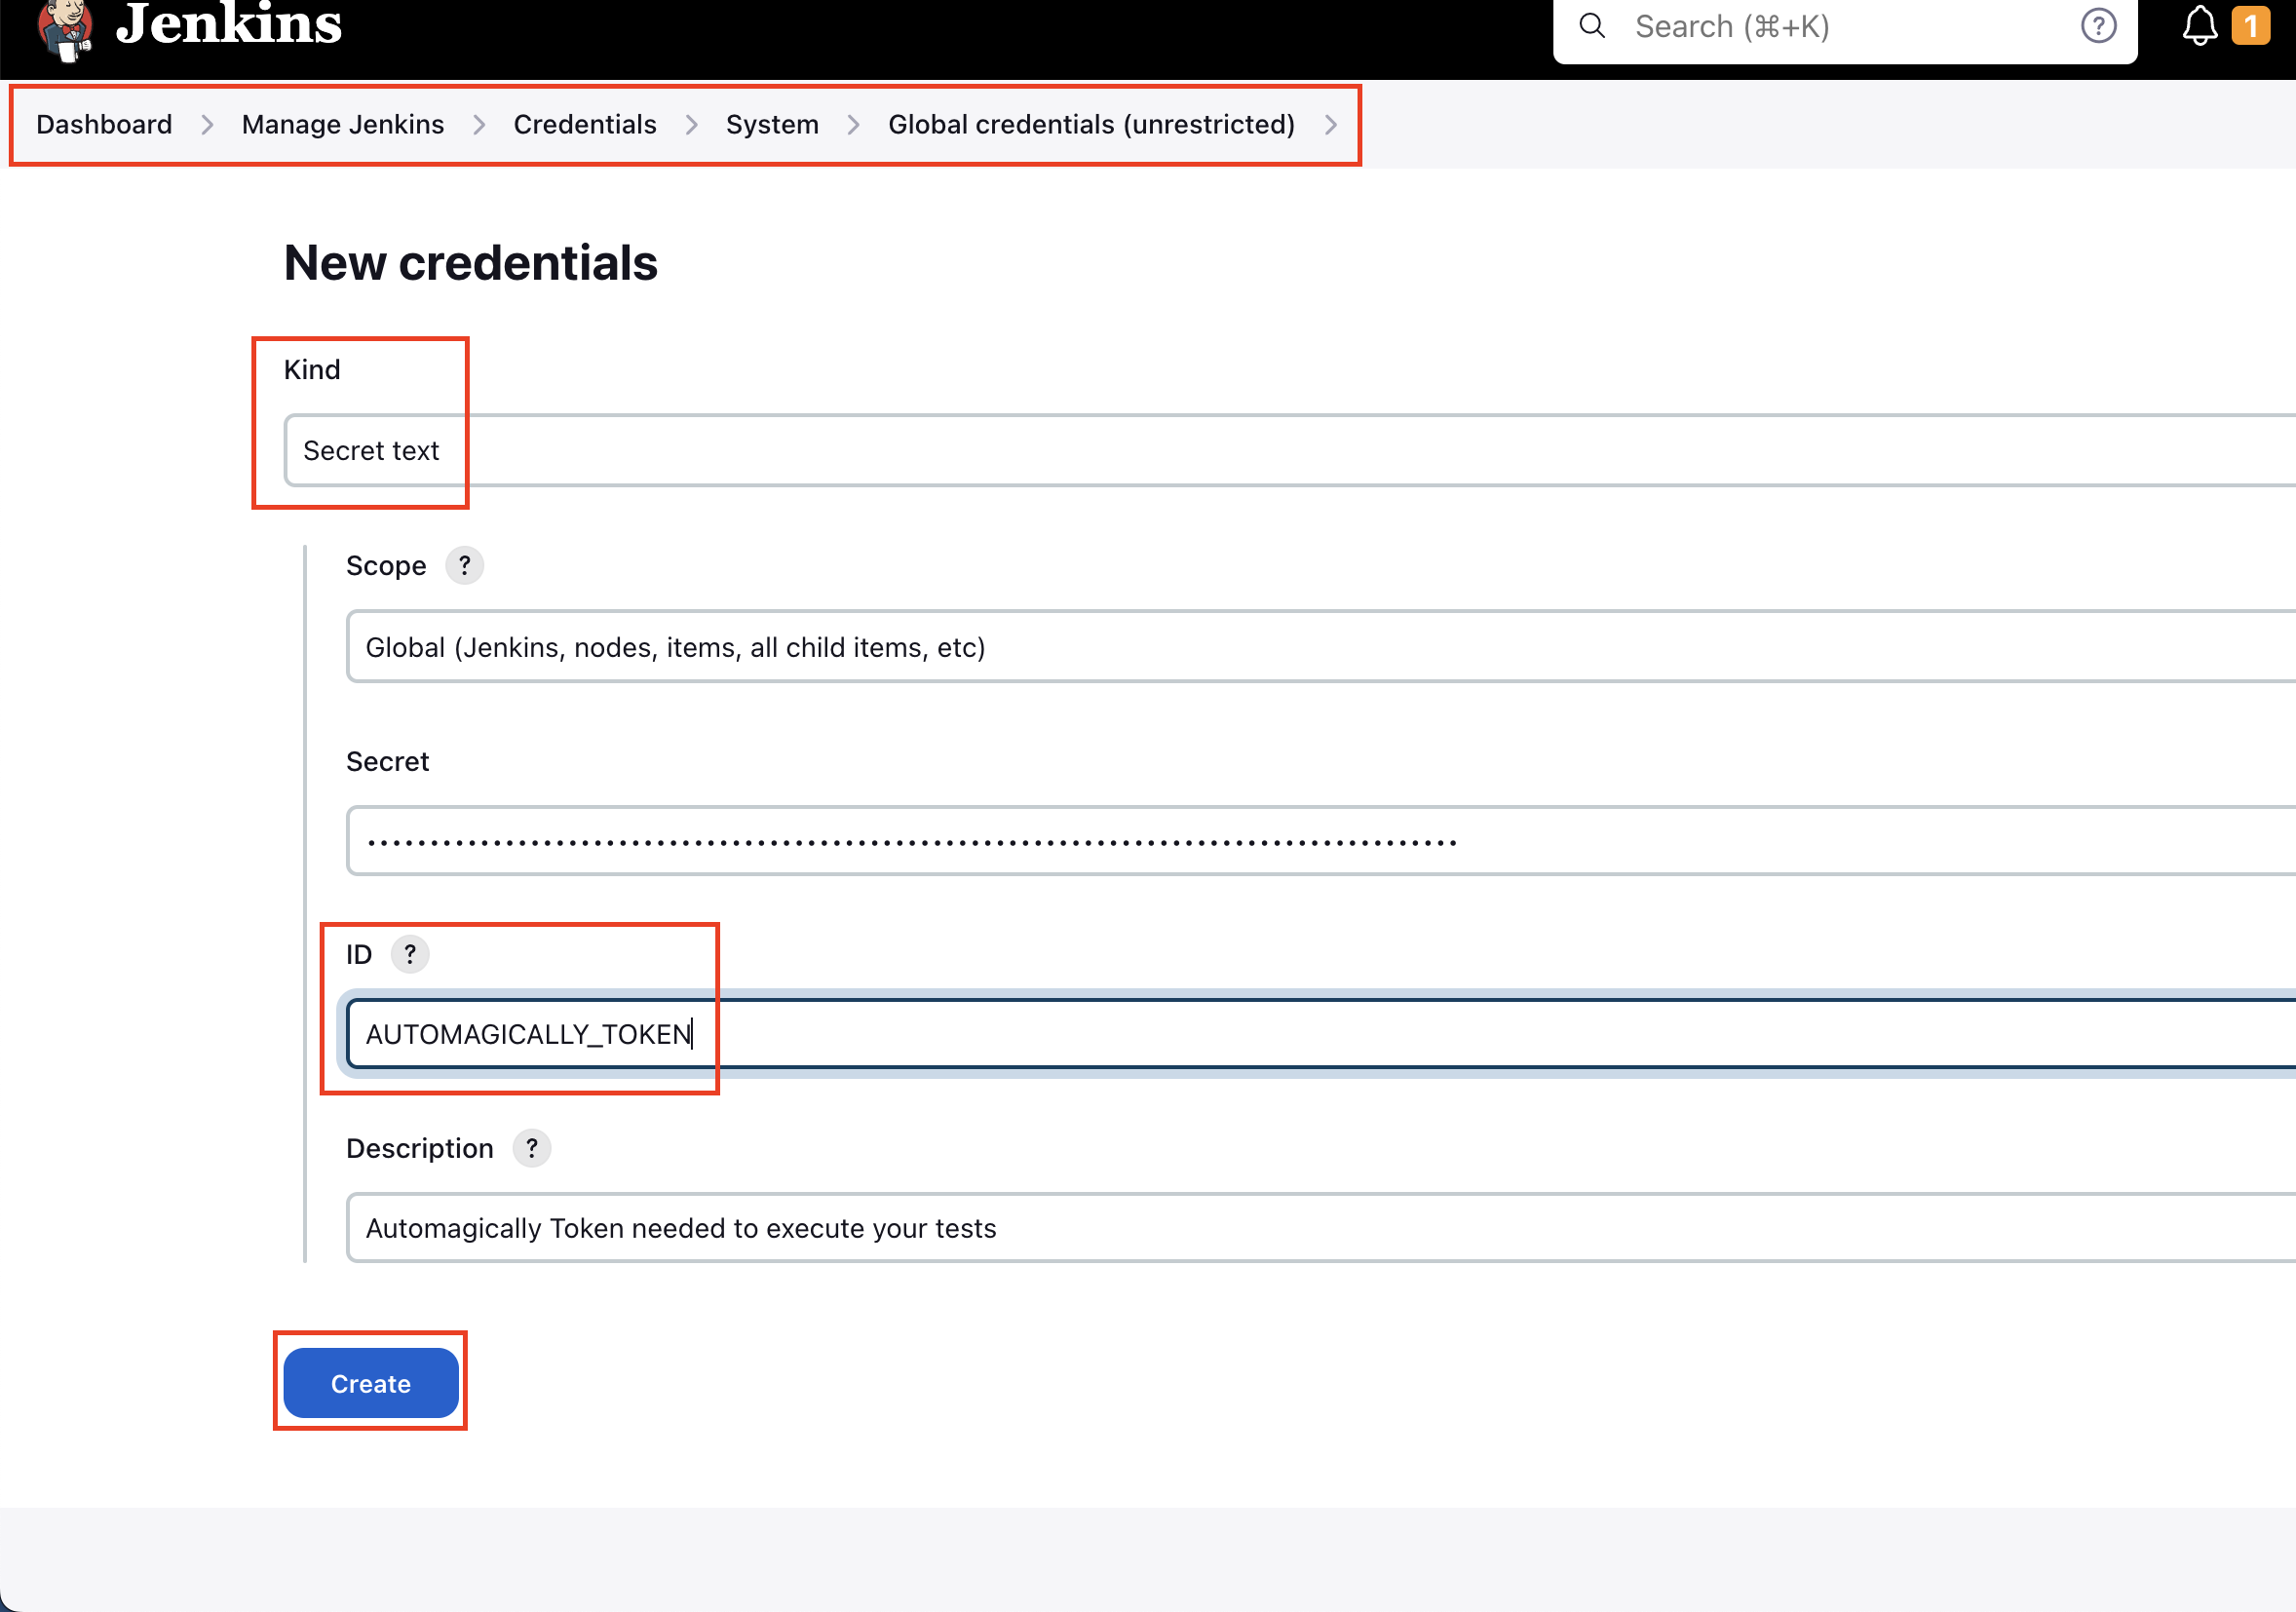
An example Jenkinsfile can be found here. Copy that code to the desired step in your pipeline. Add yourAUTOMAGICALLY_TOKEN to your secrets. Navigate to Dashboard -> Manage jenkins -> Credentials -> System -> Global credentials (unrestricted) and click on Add Credentials.
For the Kind you need to select Secret text. Be careful that your ID matches the ID that you call within the Jenkinsfile script. Copy your token value to the Secret field and click Create.
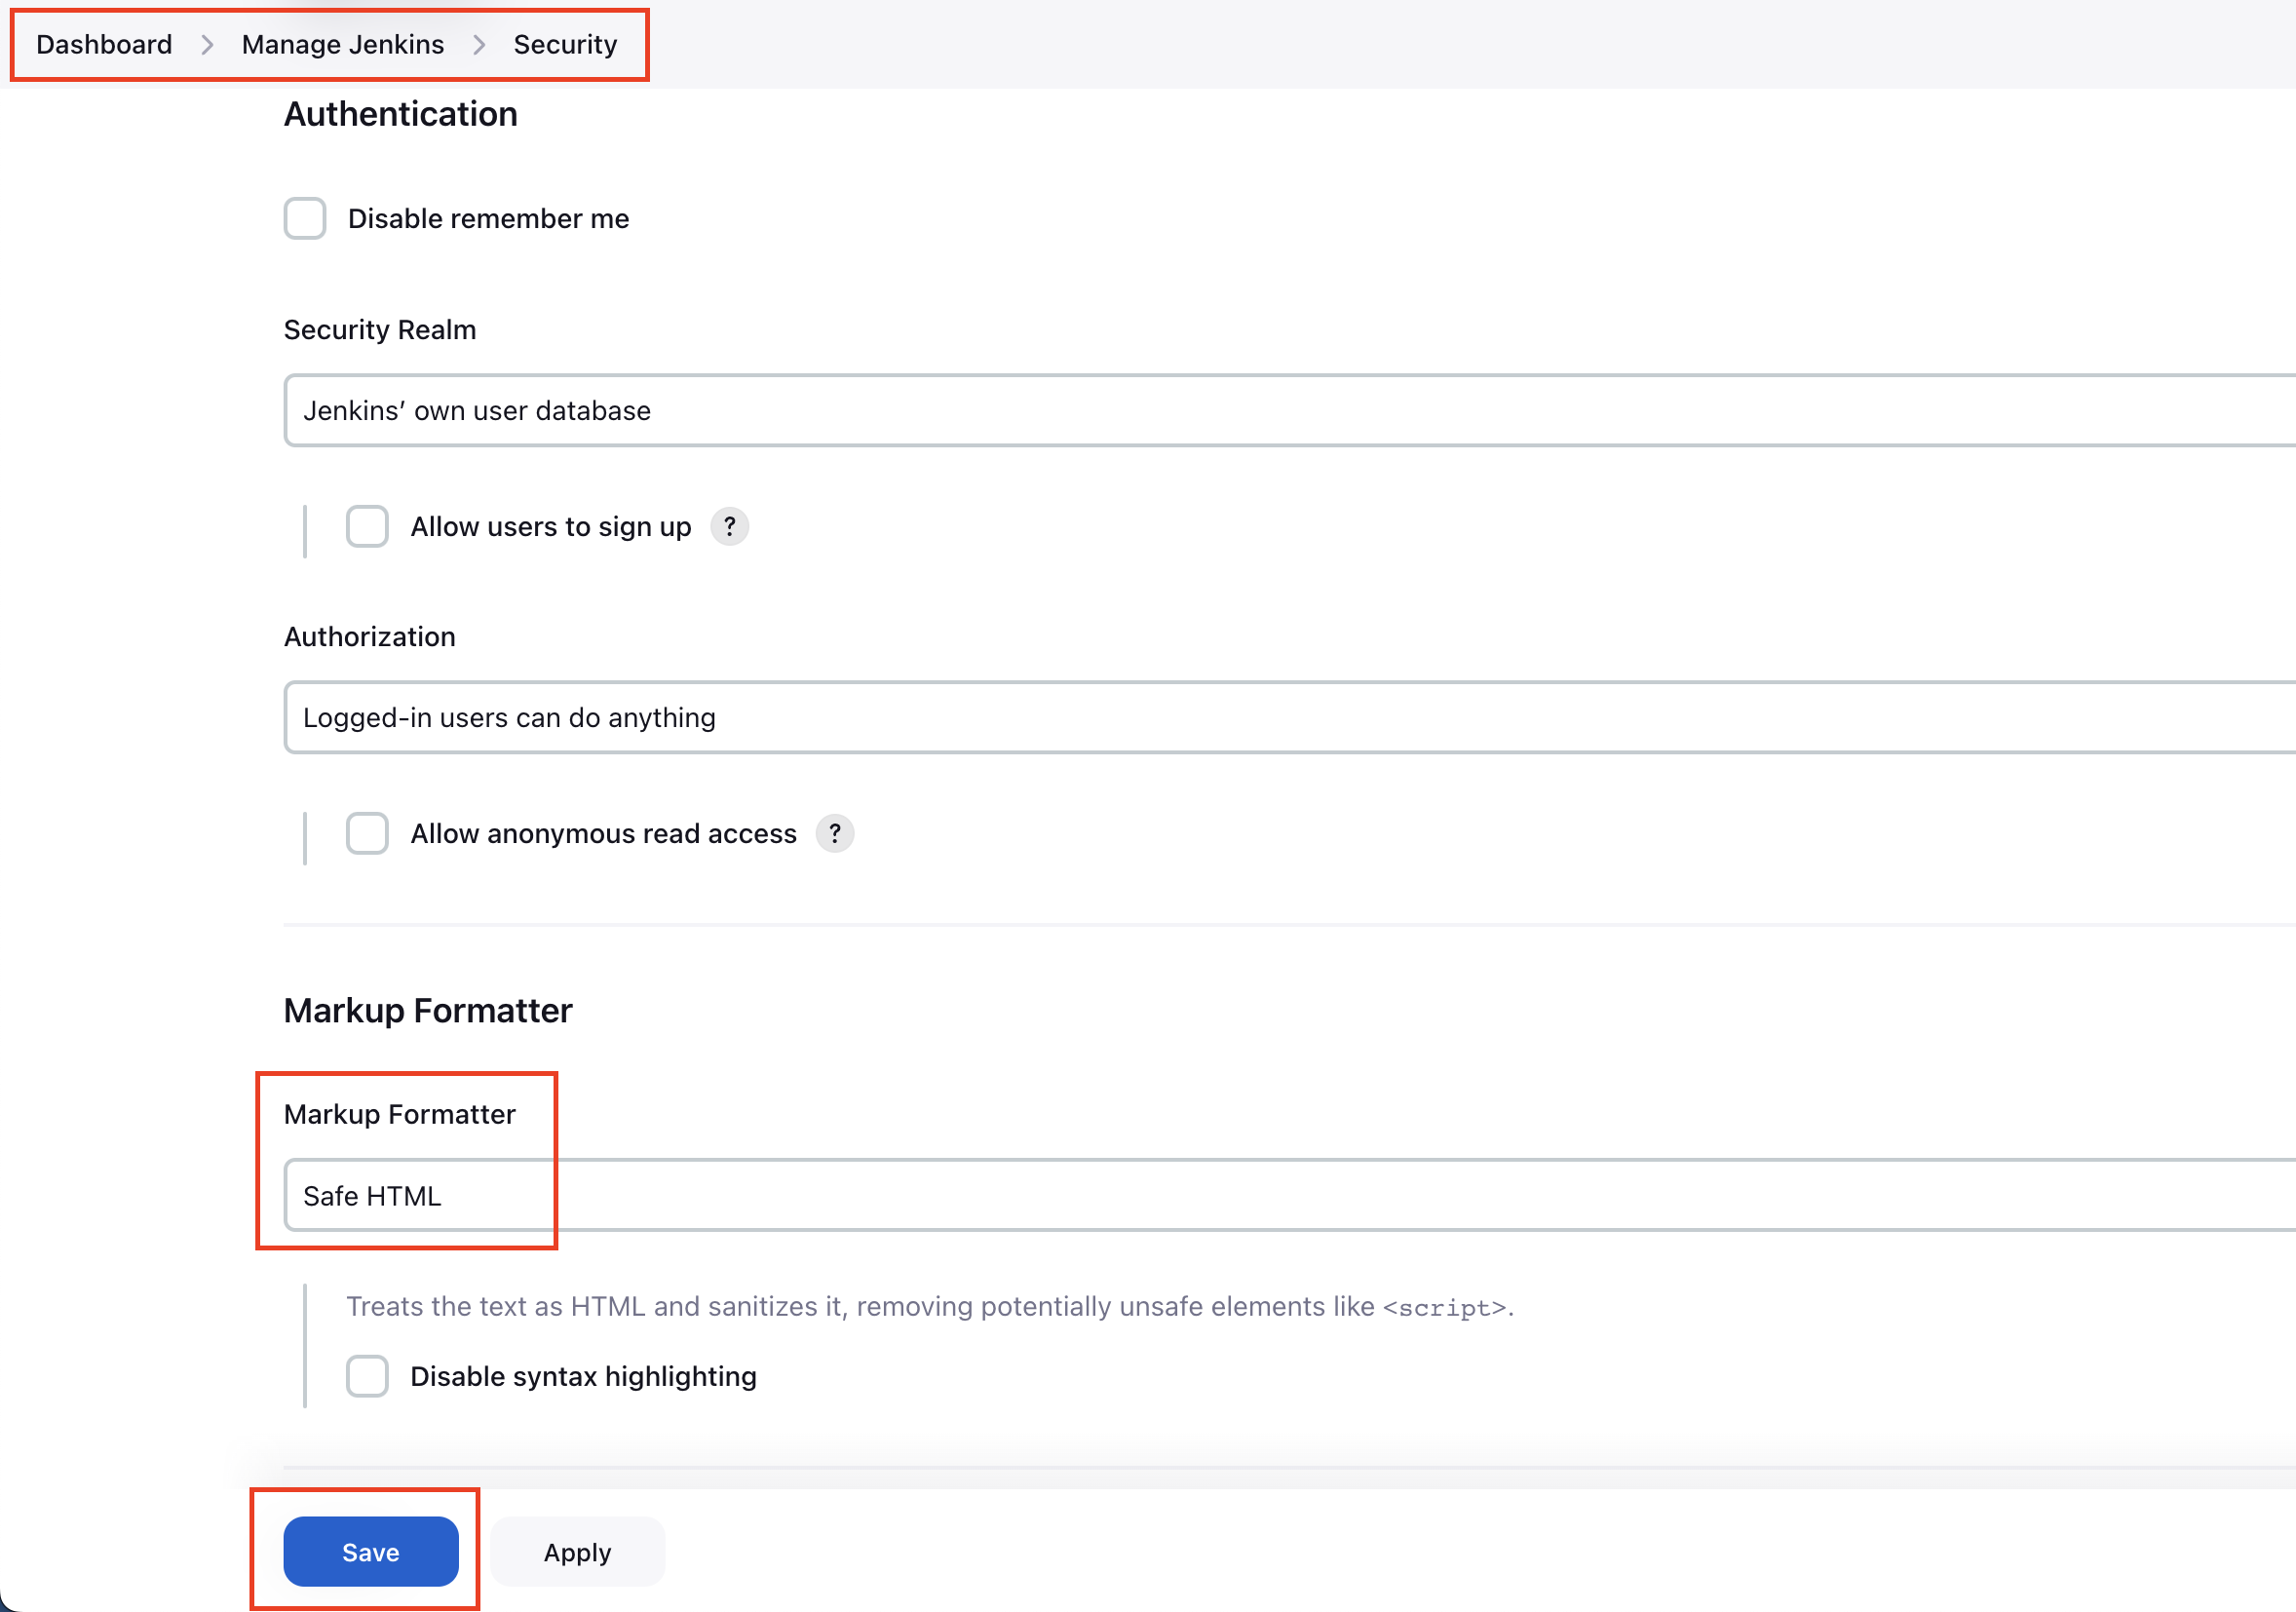
Dashboard -> Manage jenkins -> Security and for Markup Formatter select Safe HTML and then save.
Creating Jenkins pipeline
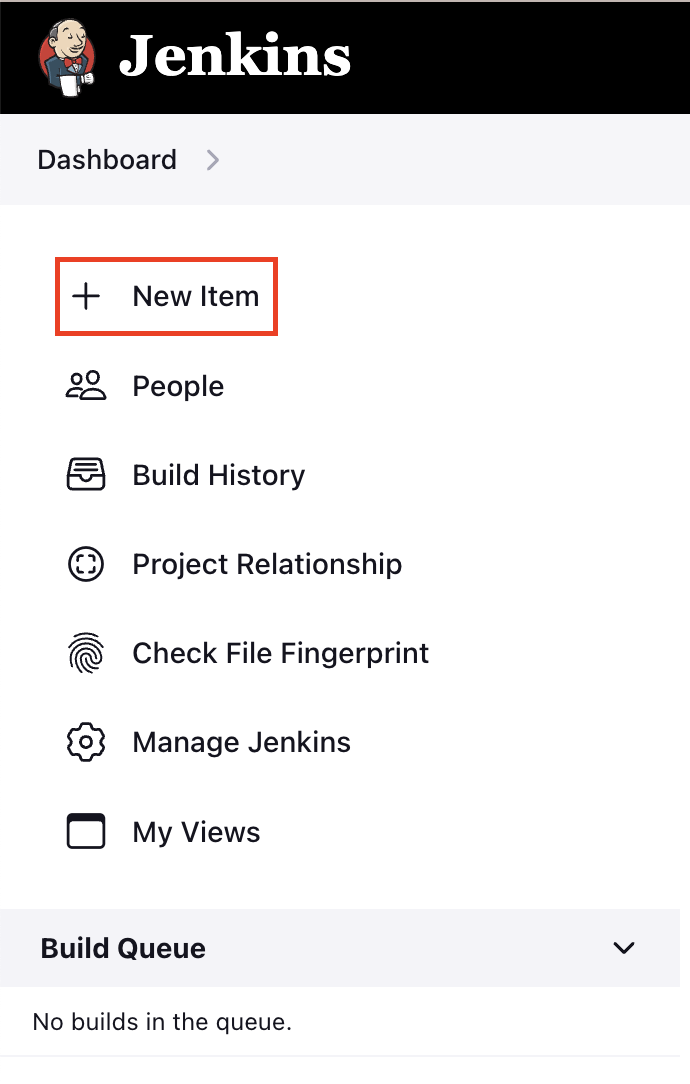
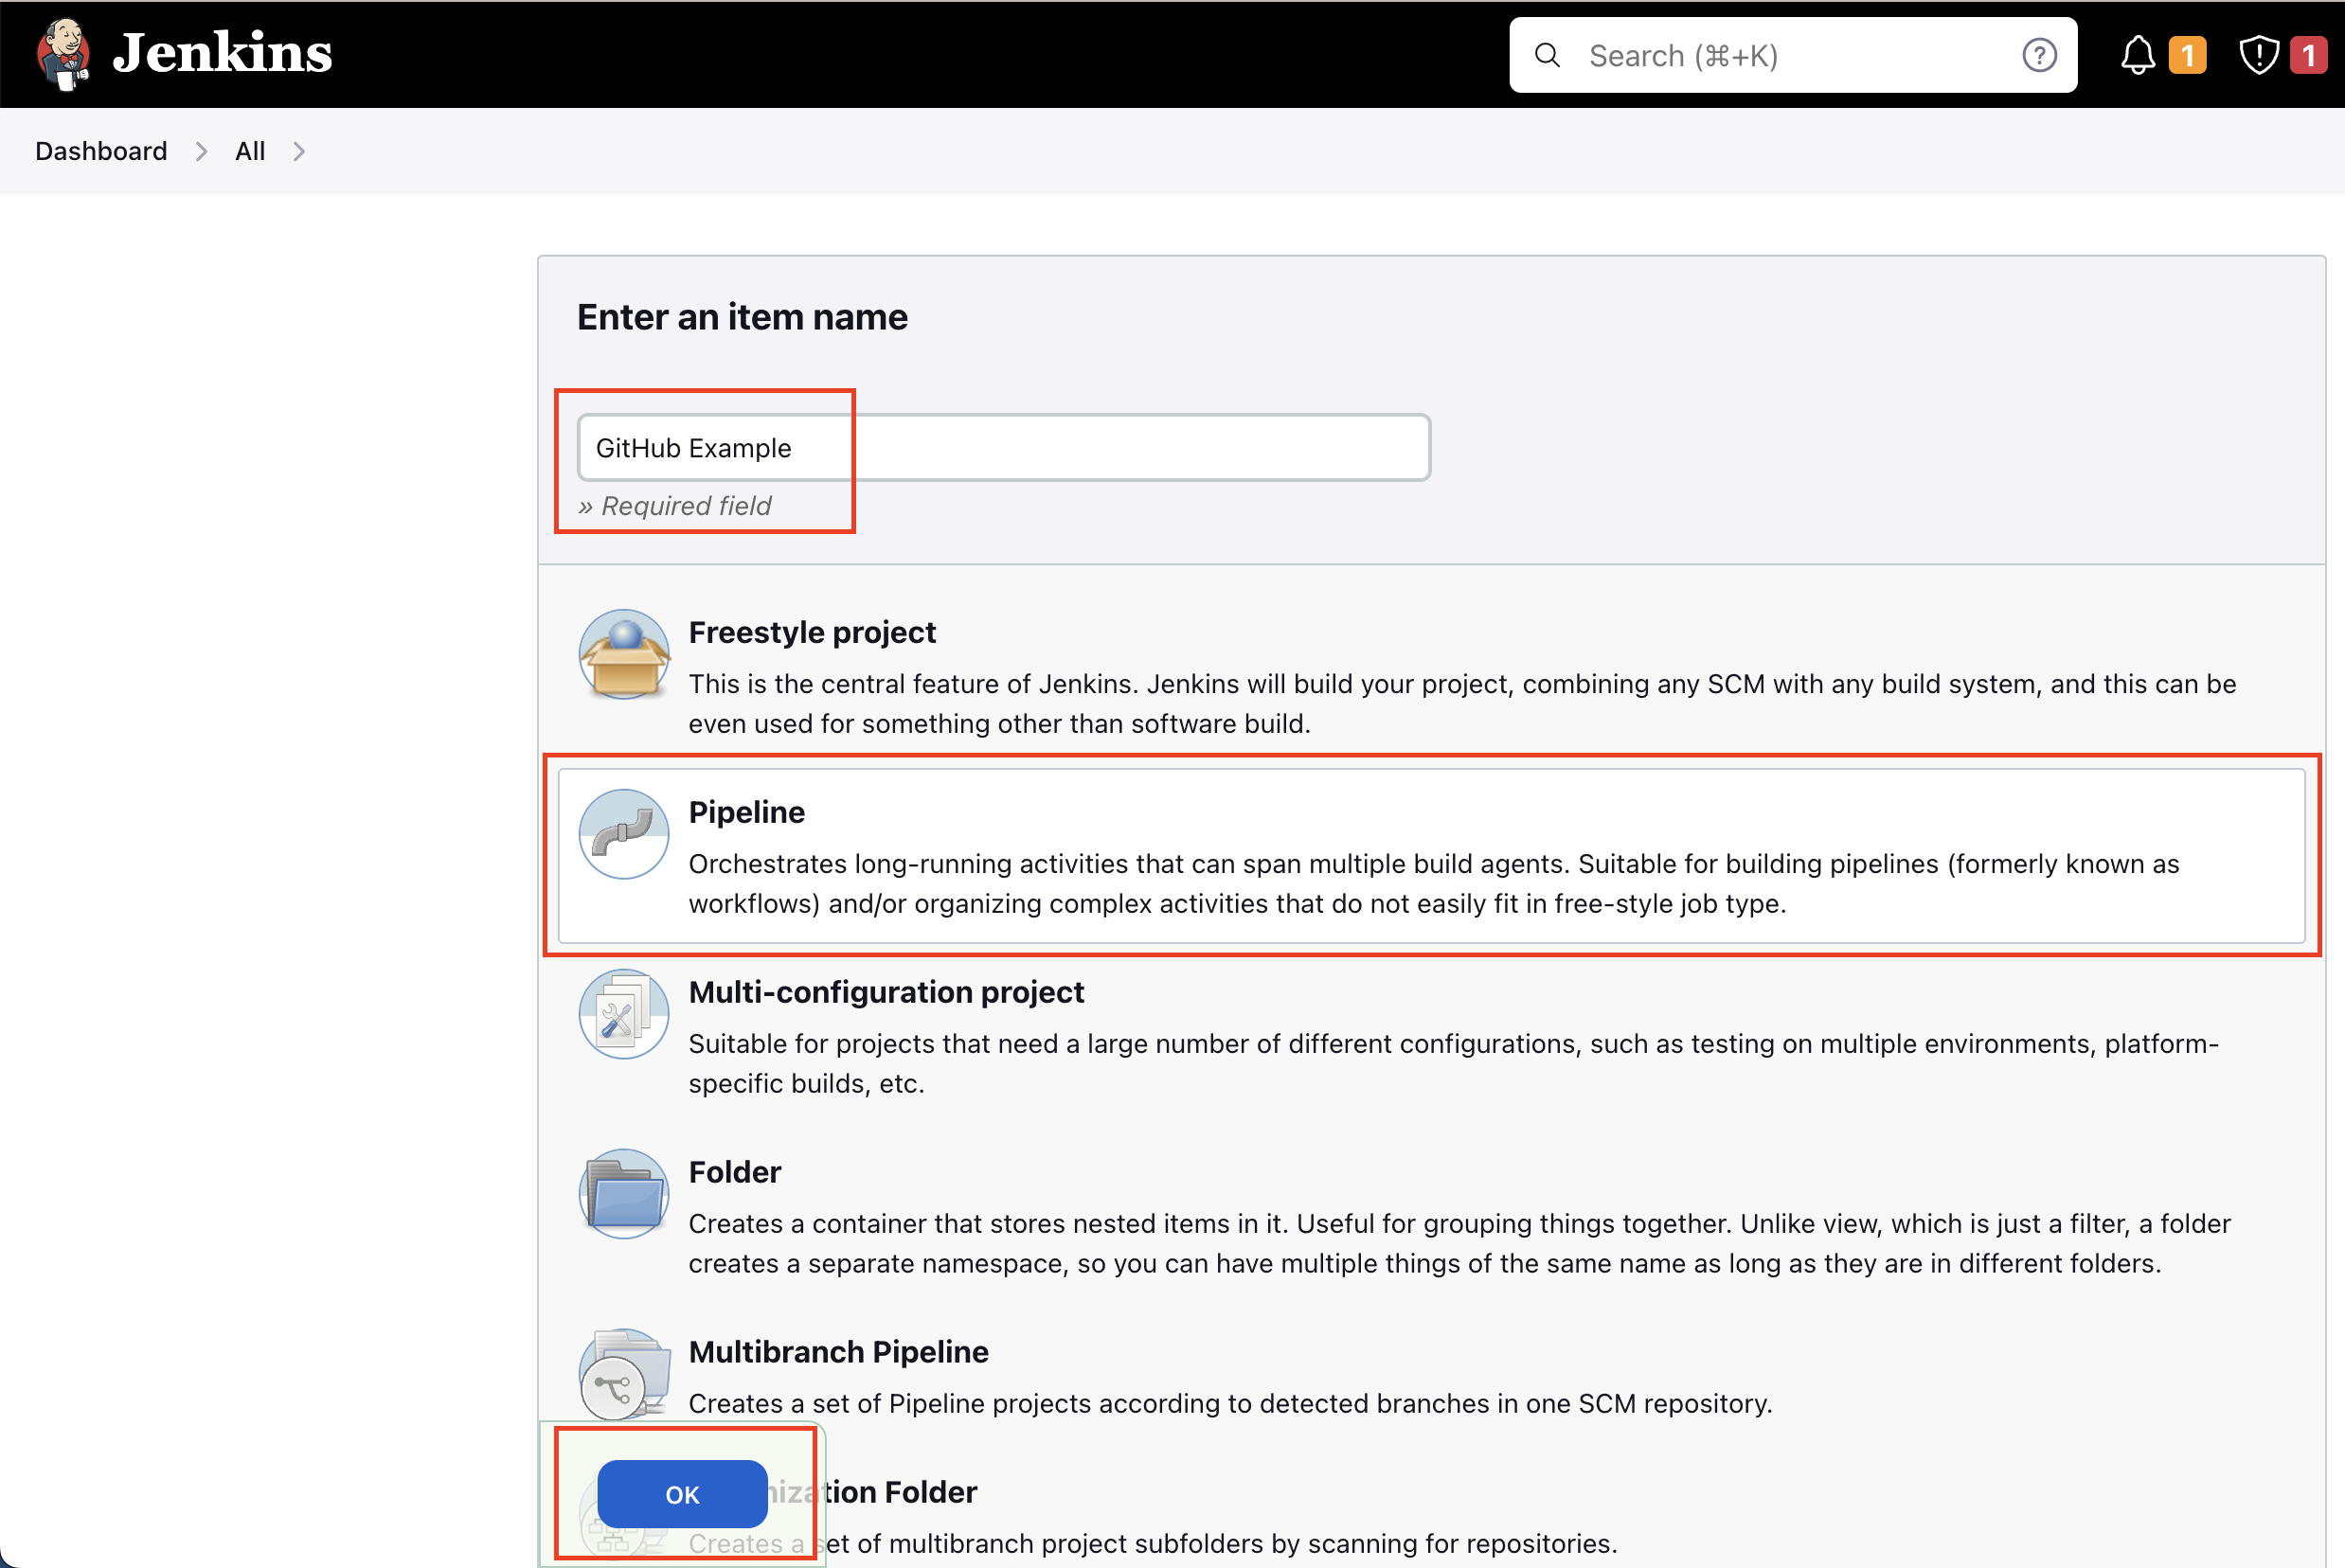
Here is an example of creating a pipeline to test the script. On your Dashboard page, click on+ New Item
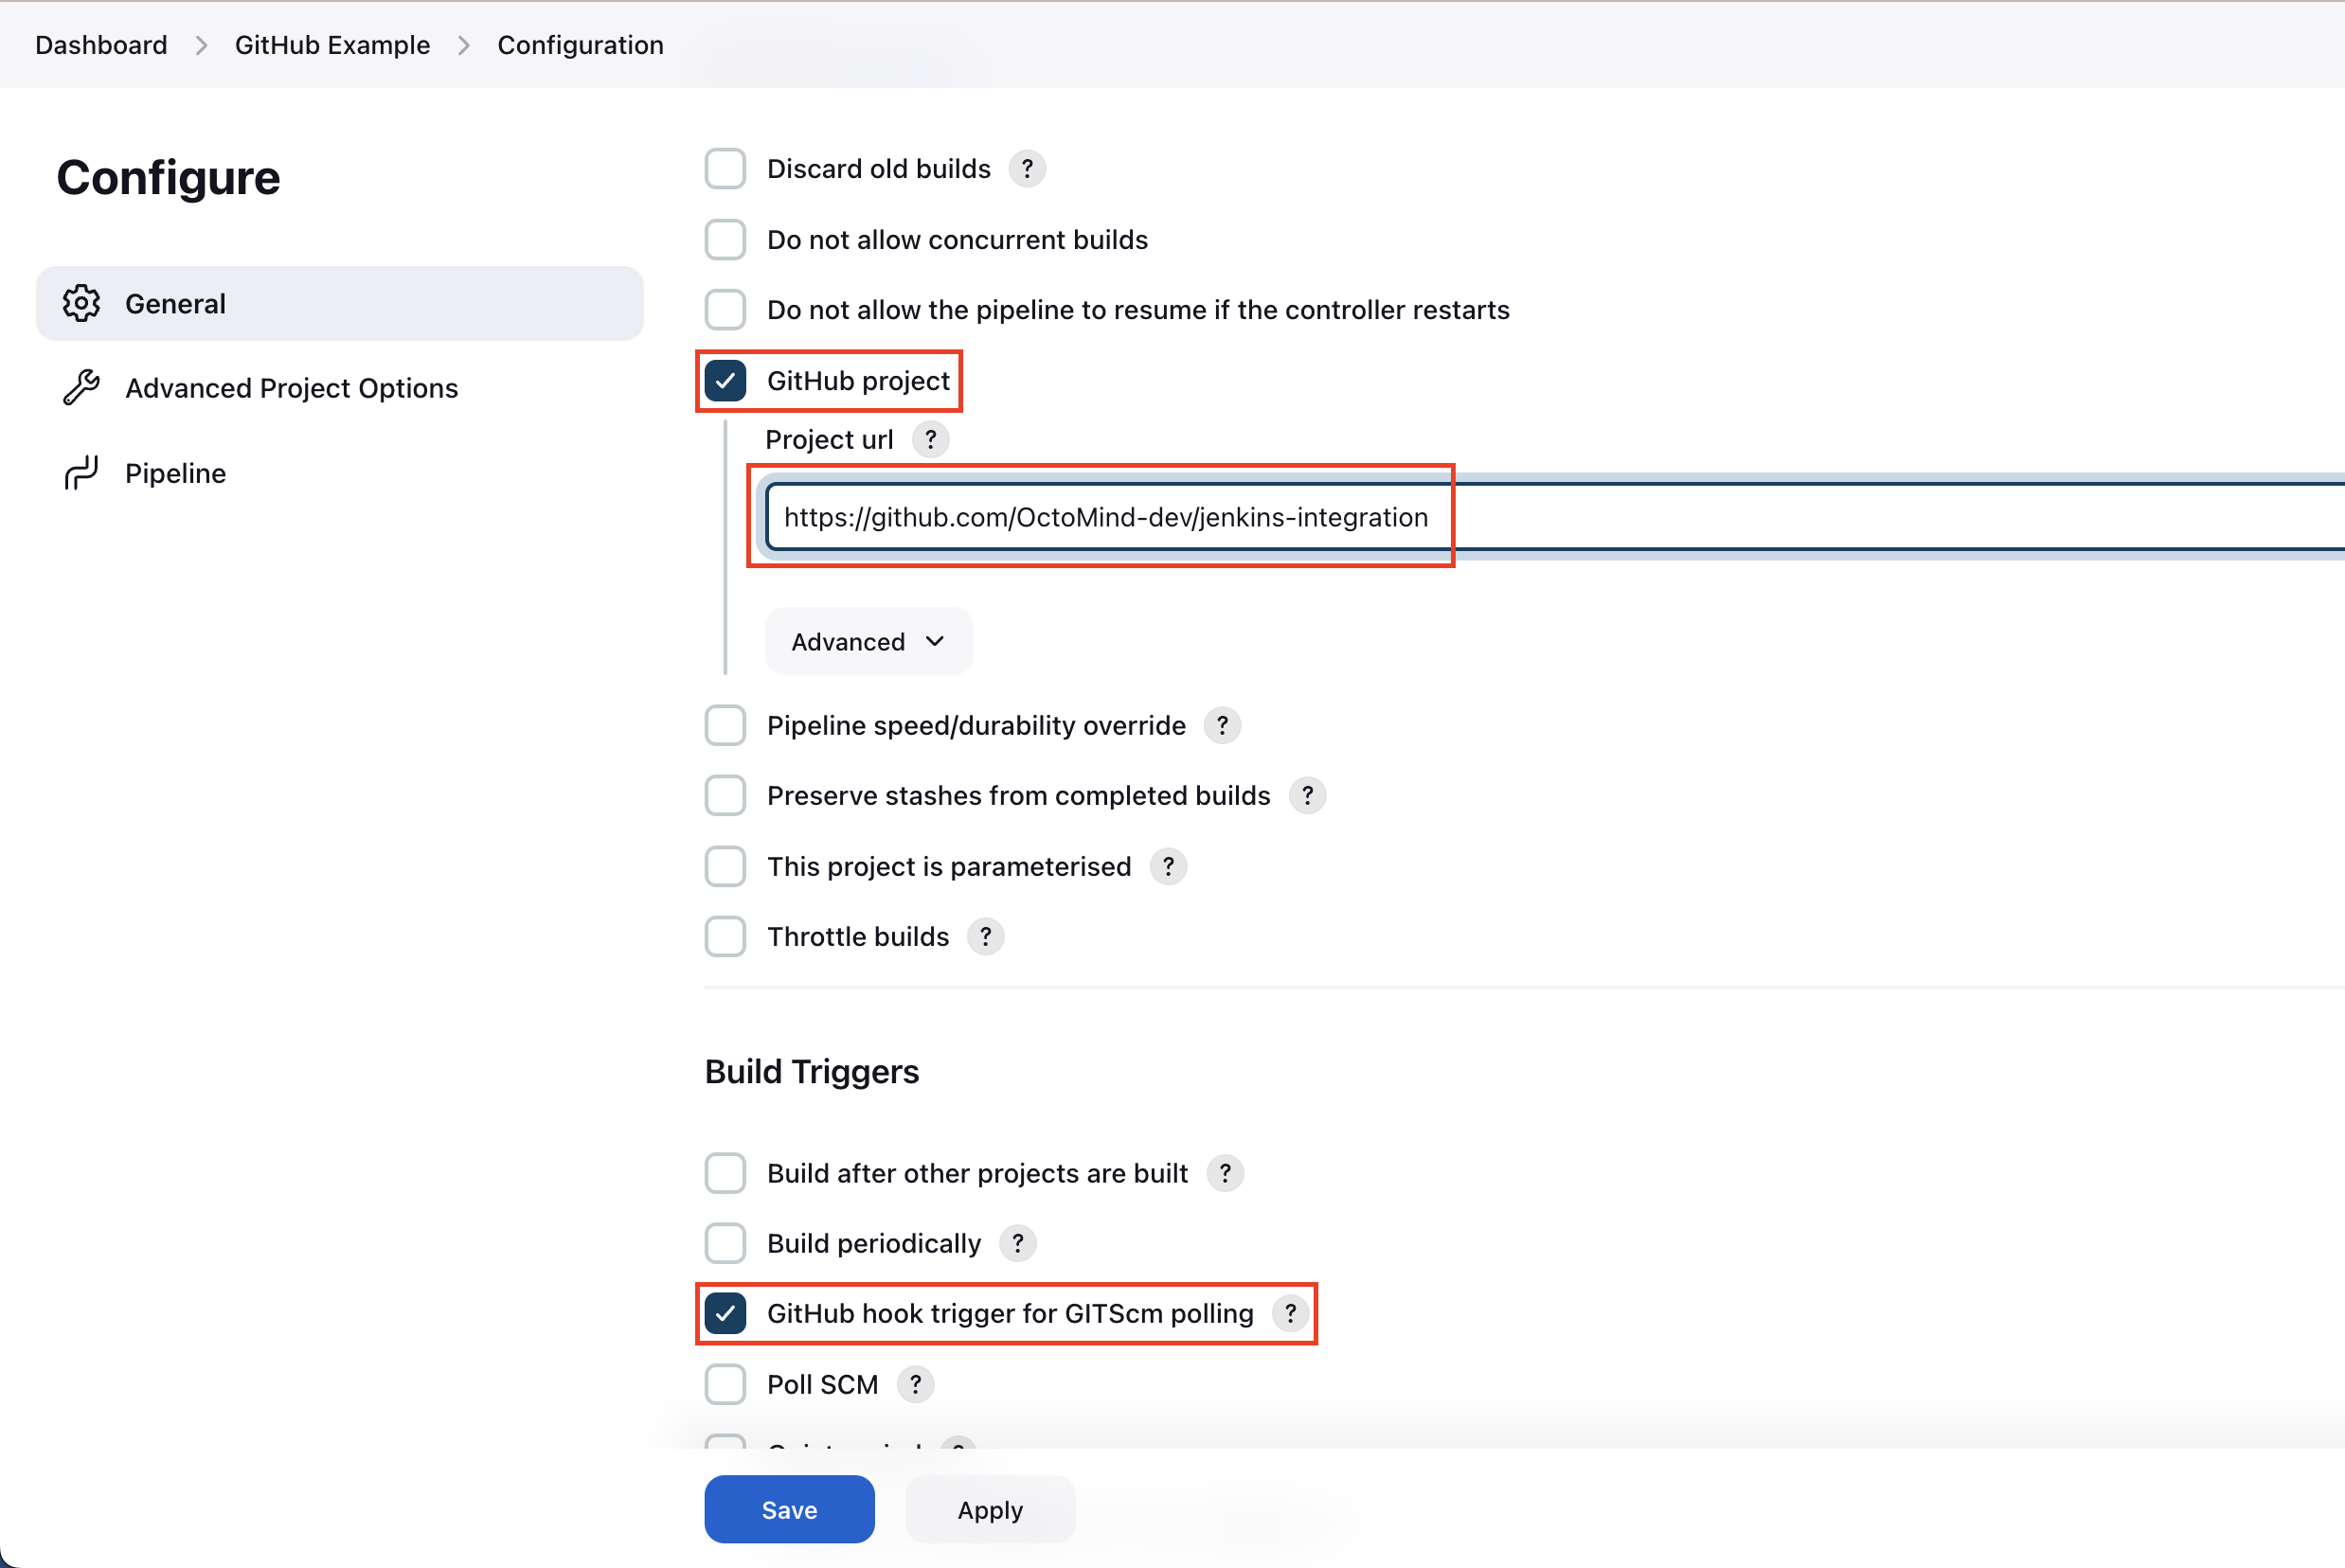
GitHub project and paste an url to your repo so you will have a button on your dashboard to take you to your repo.
You need to check GitHub hook trigger for GITScm polling so our previously created hook can trigger our pipeline.
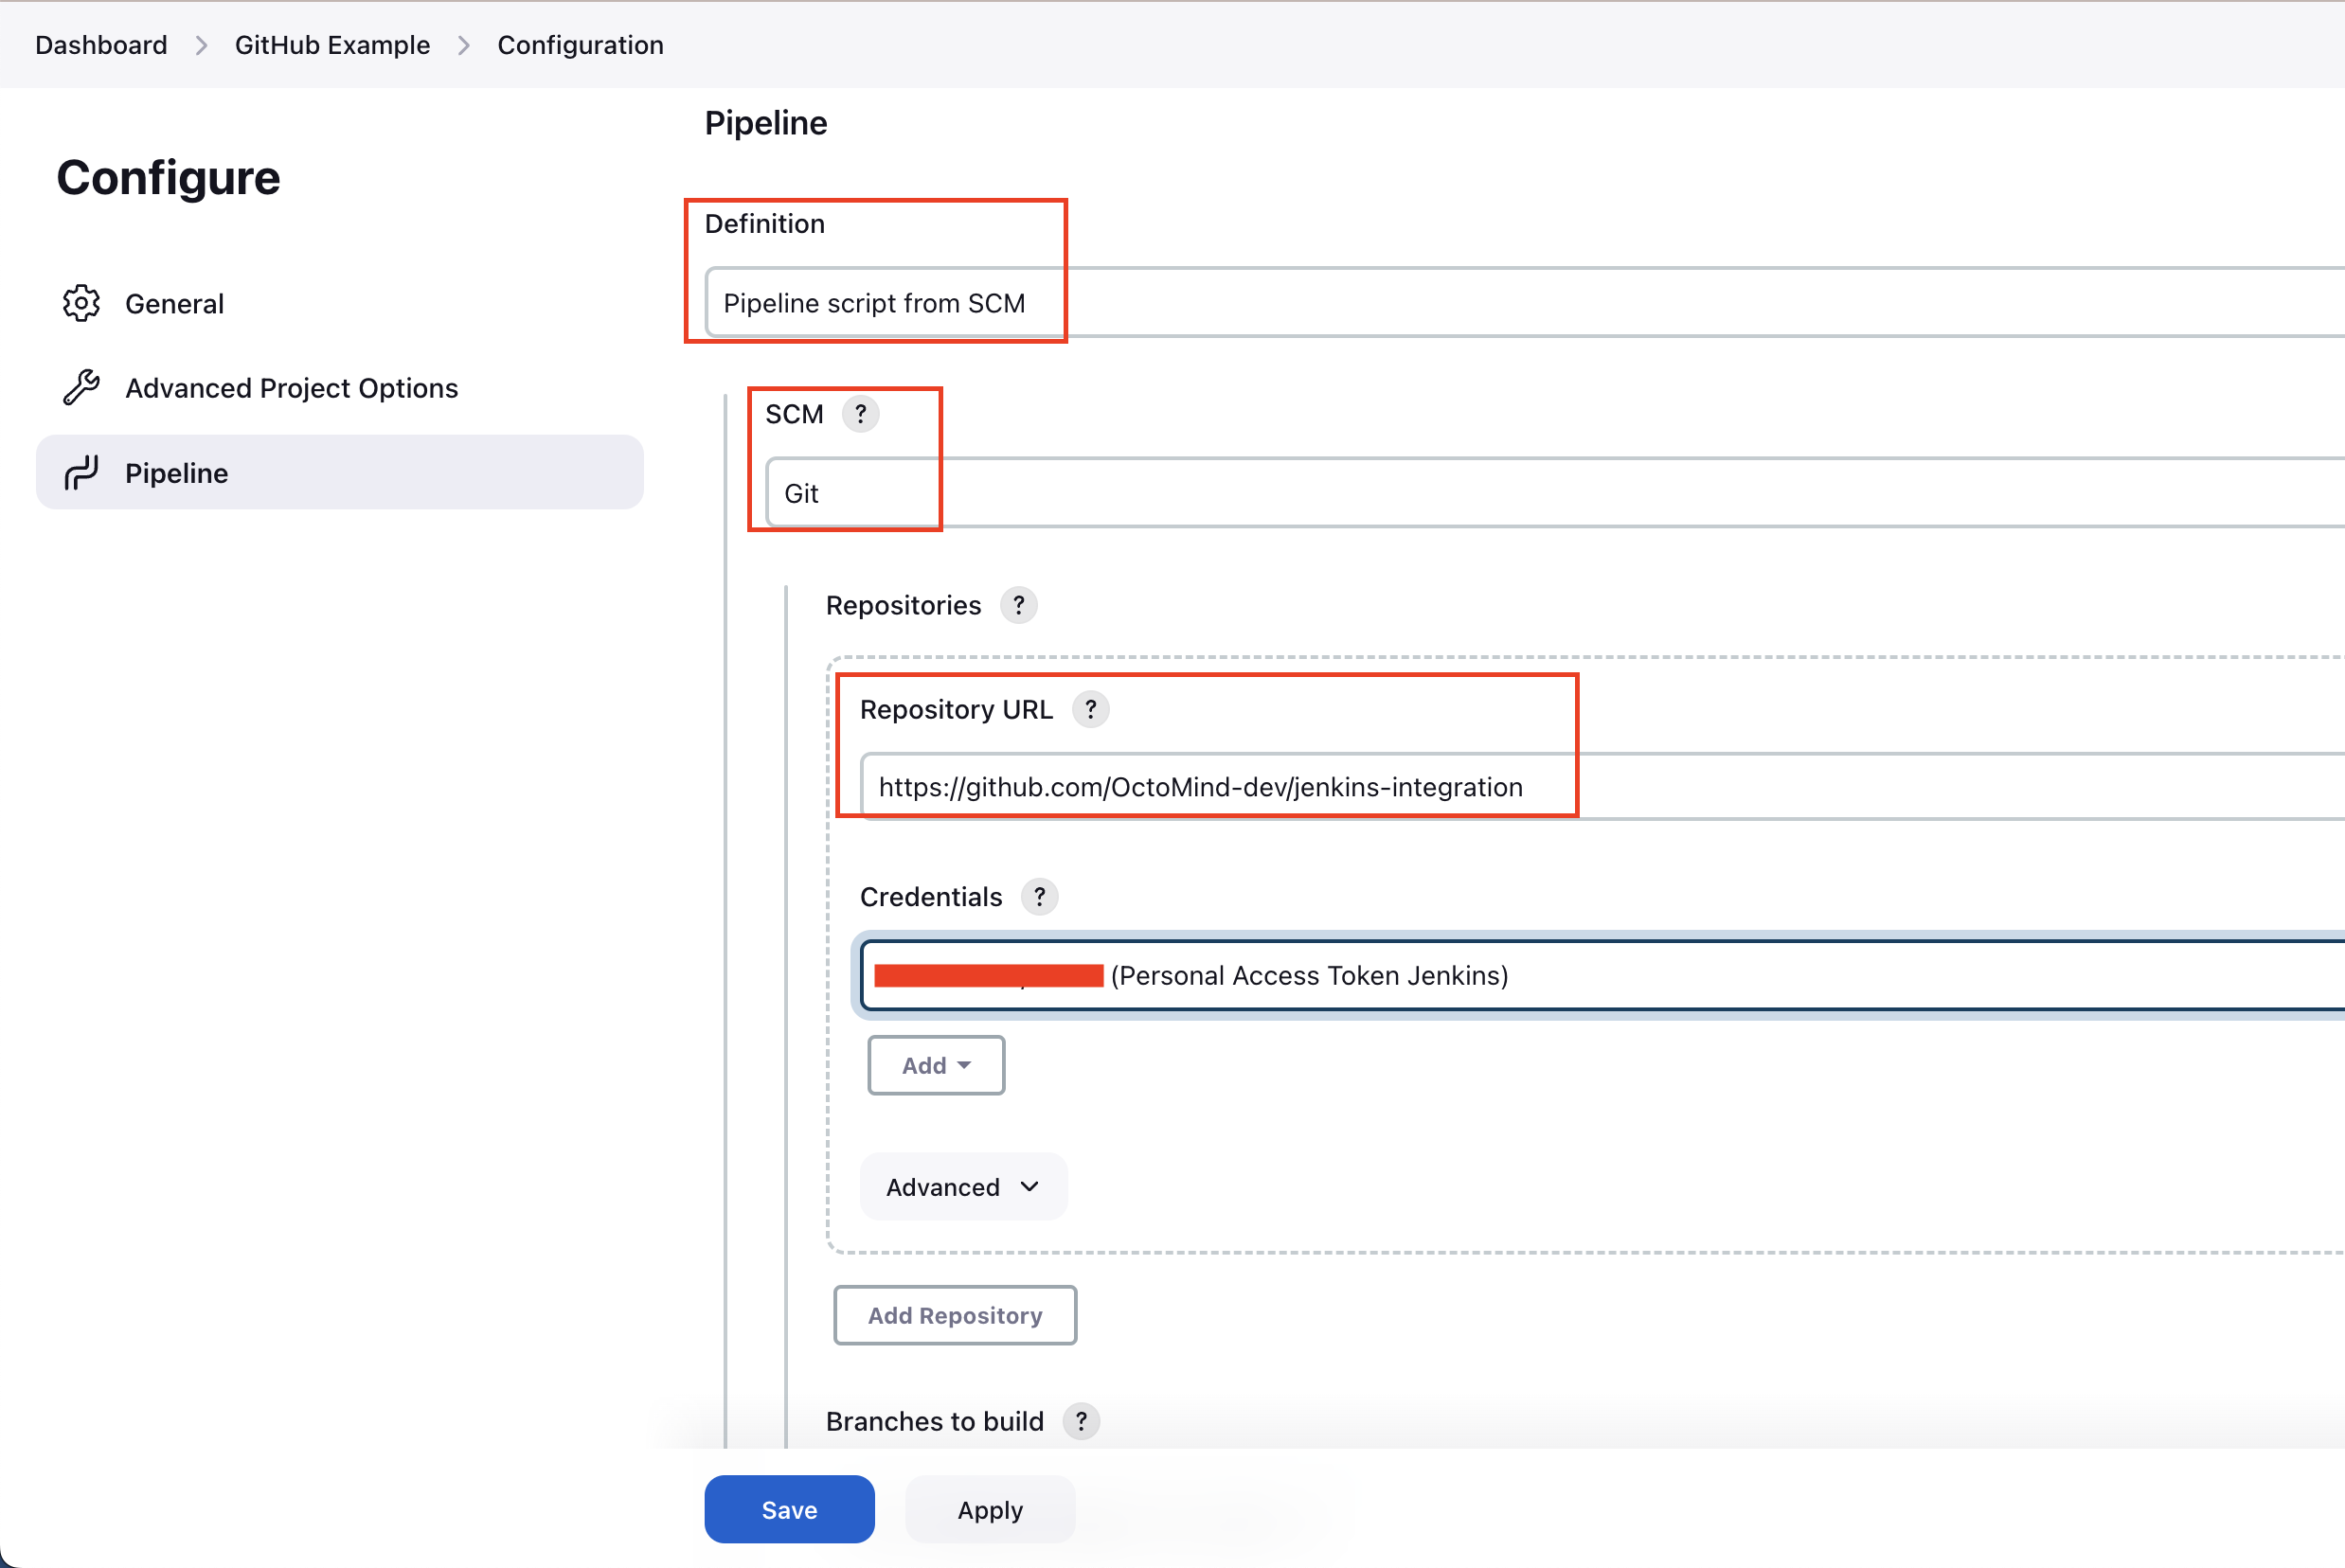
Definition select Pipeline script from SCM.
For SCM you select Git
After adding your Repository URL, you’ll need to provide credentials if it’s a private repository.
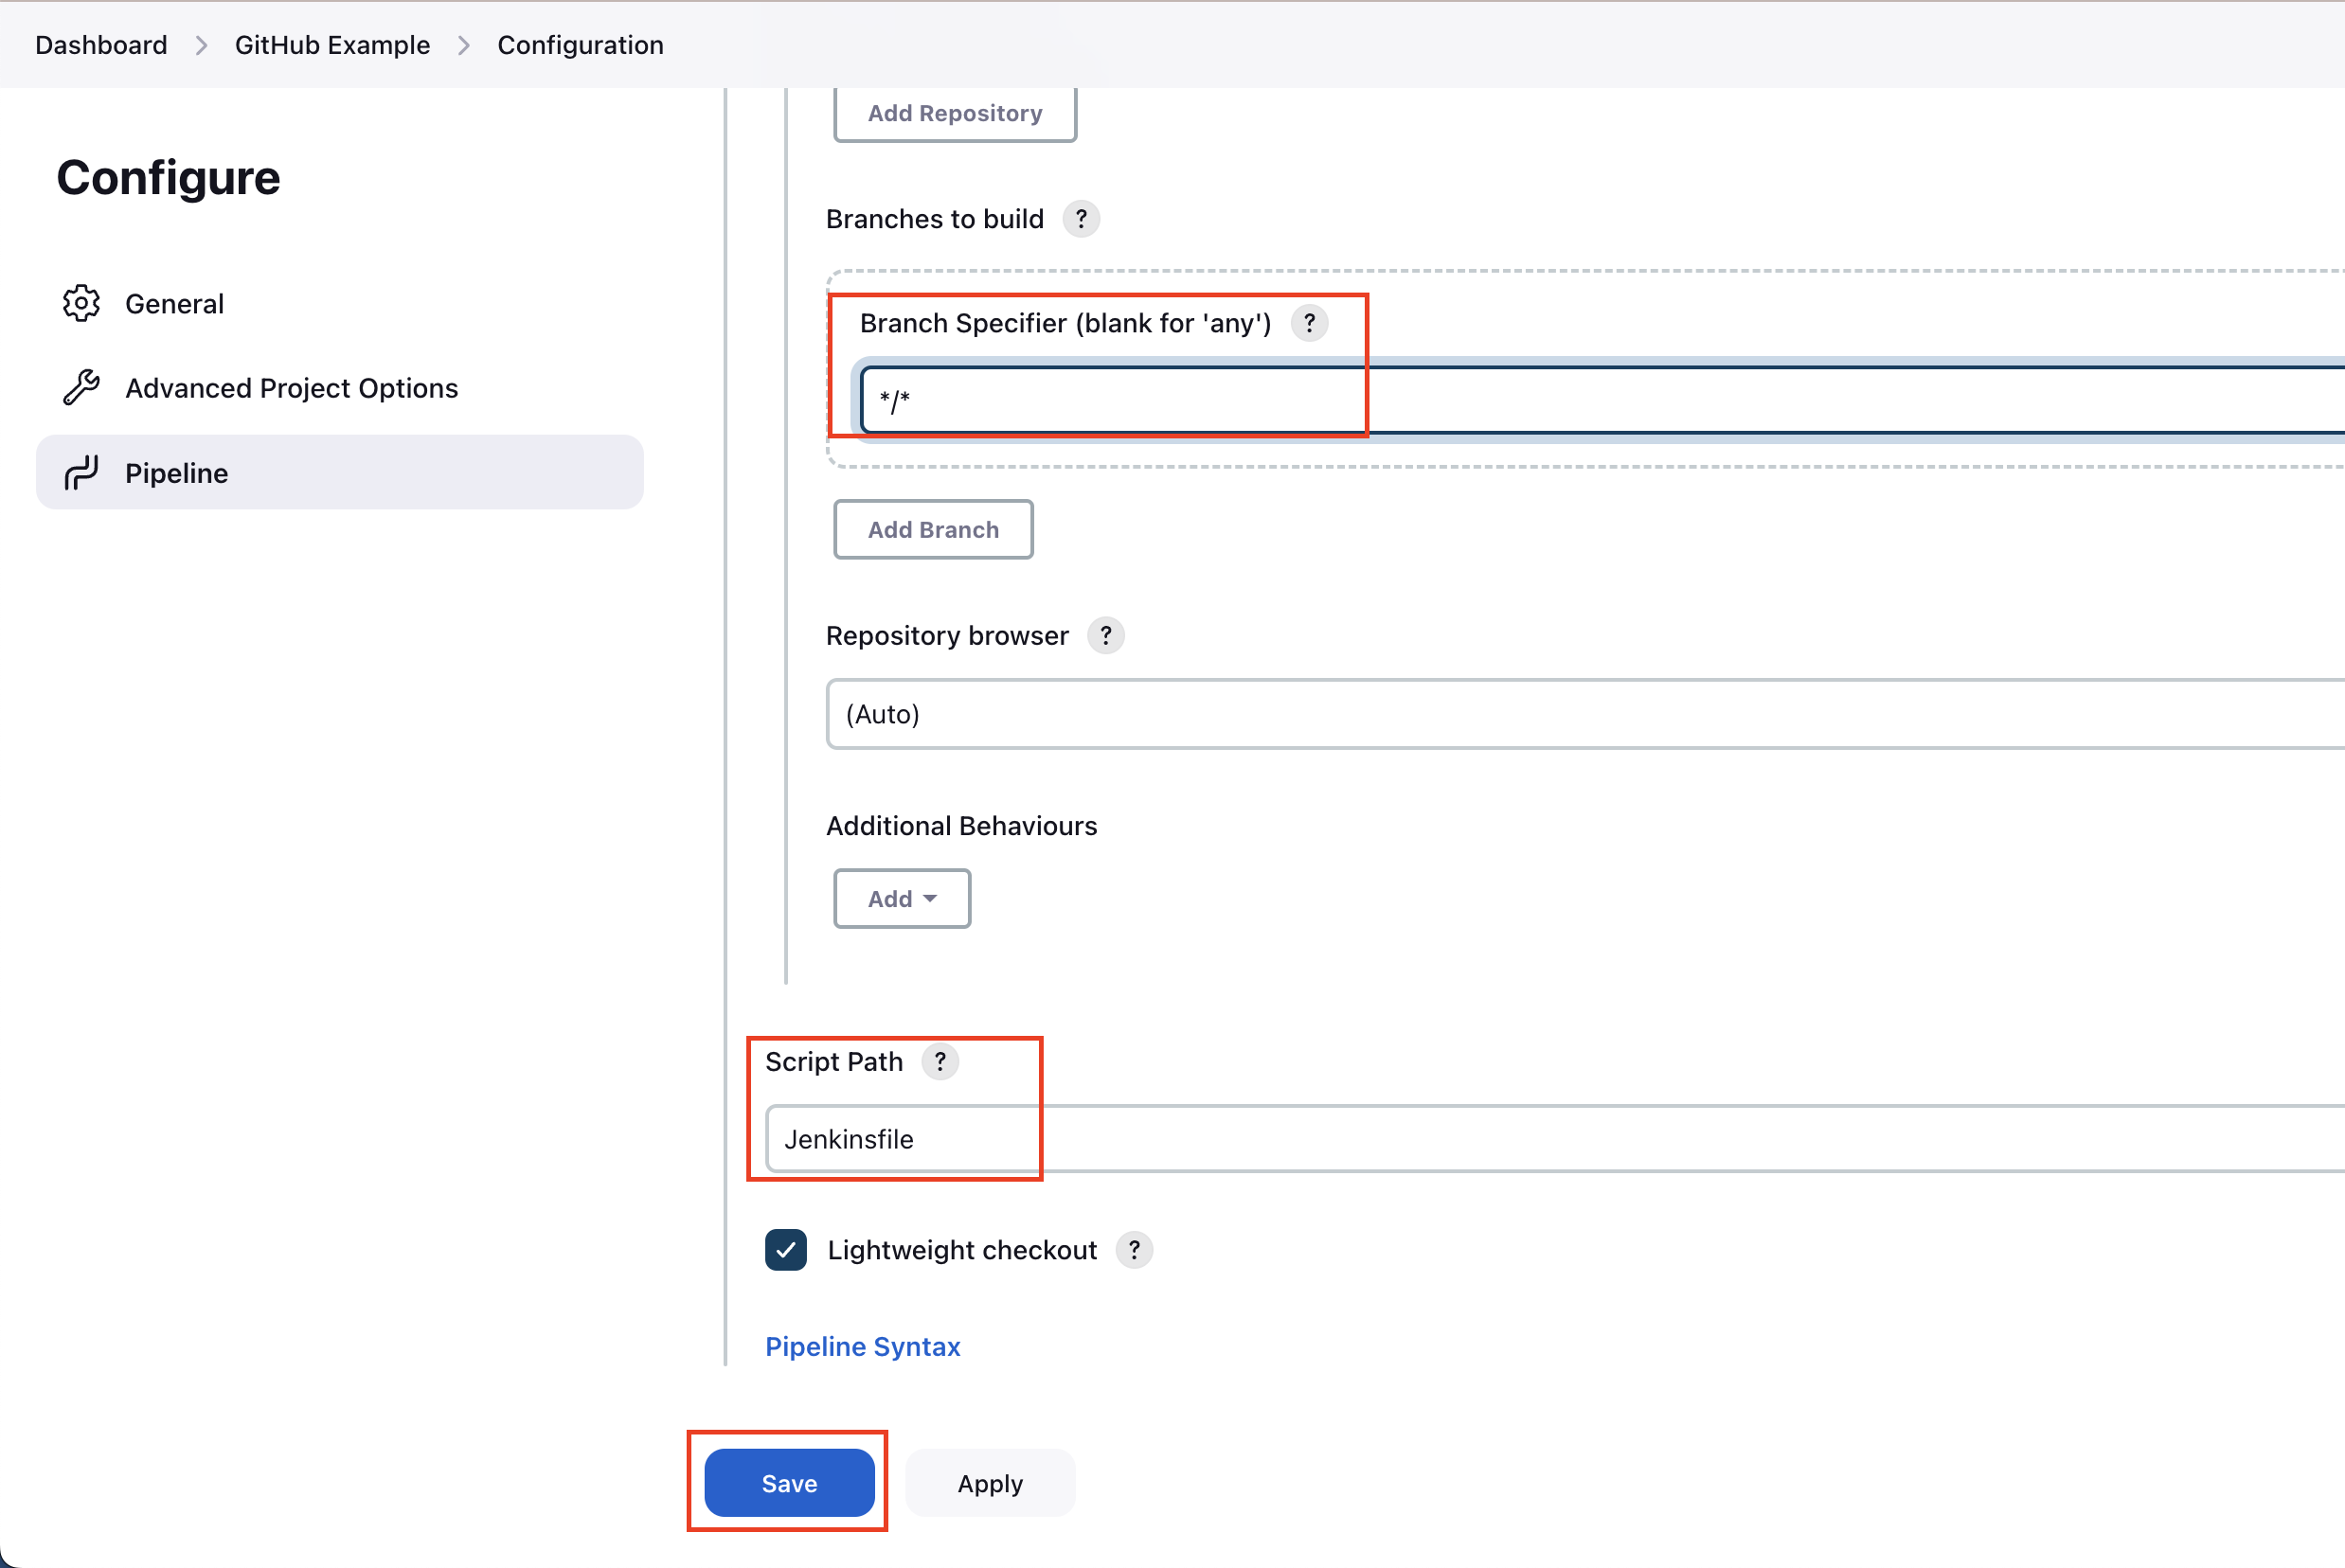
*/* will trigger the pipeline on pushing to any branch.
If you want to trigger pipeline only on specific branch changes, e.g. main, put in */main.
The last field asks you to set the path and name to Jenkinsfile, but it’s on the top level in our repository and it’s named Jenkinsfile, so no changes are required.
Lastly, click on Save.